Wood Bowl

My first red mallee bowl!
Table of Contents
Overview
- Start: Jun 9, 2024
- End: Jun 30, 2024
- Wood Species: Red Mallee
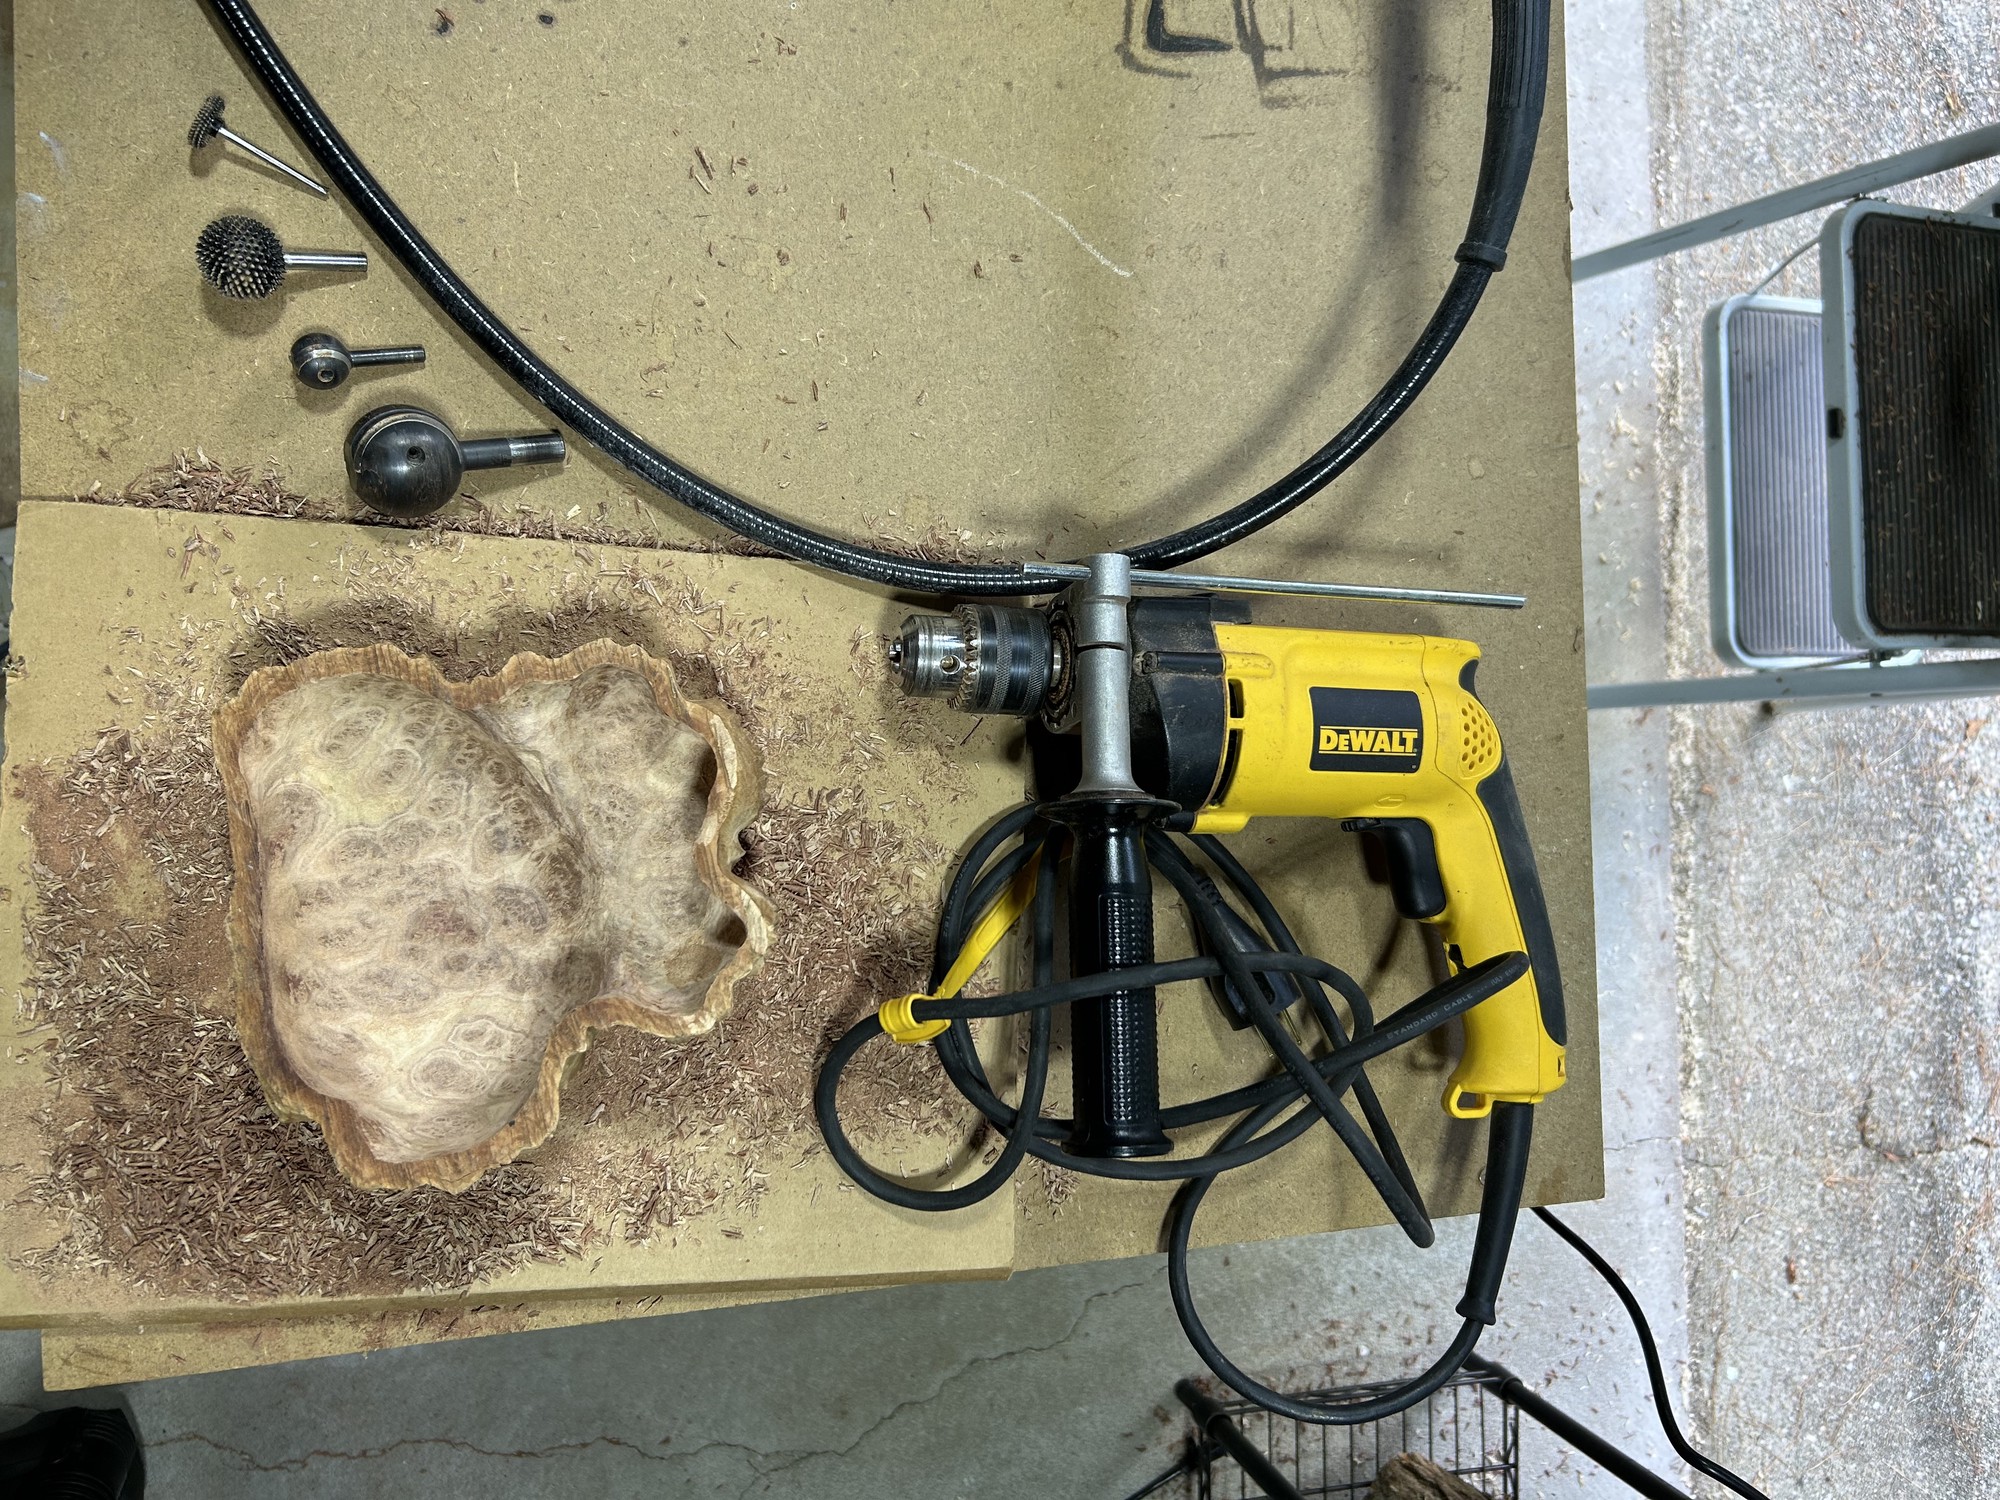
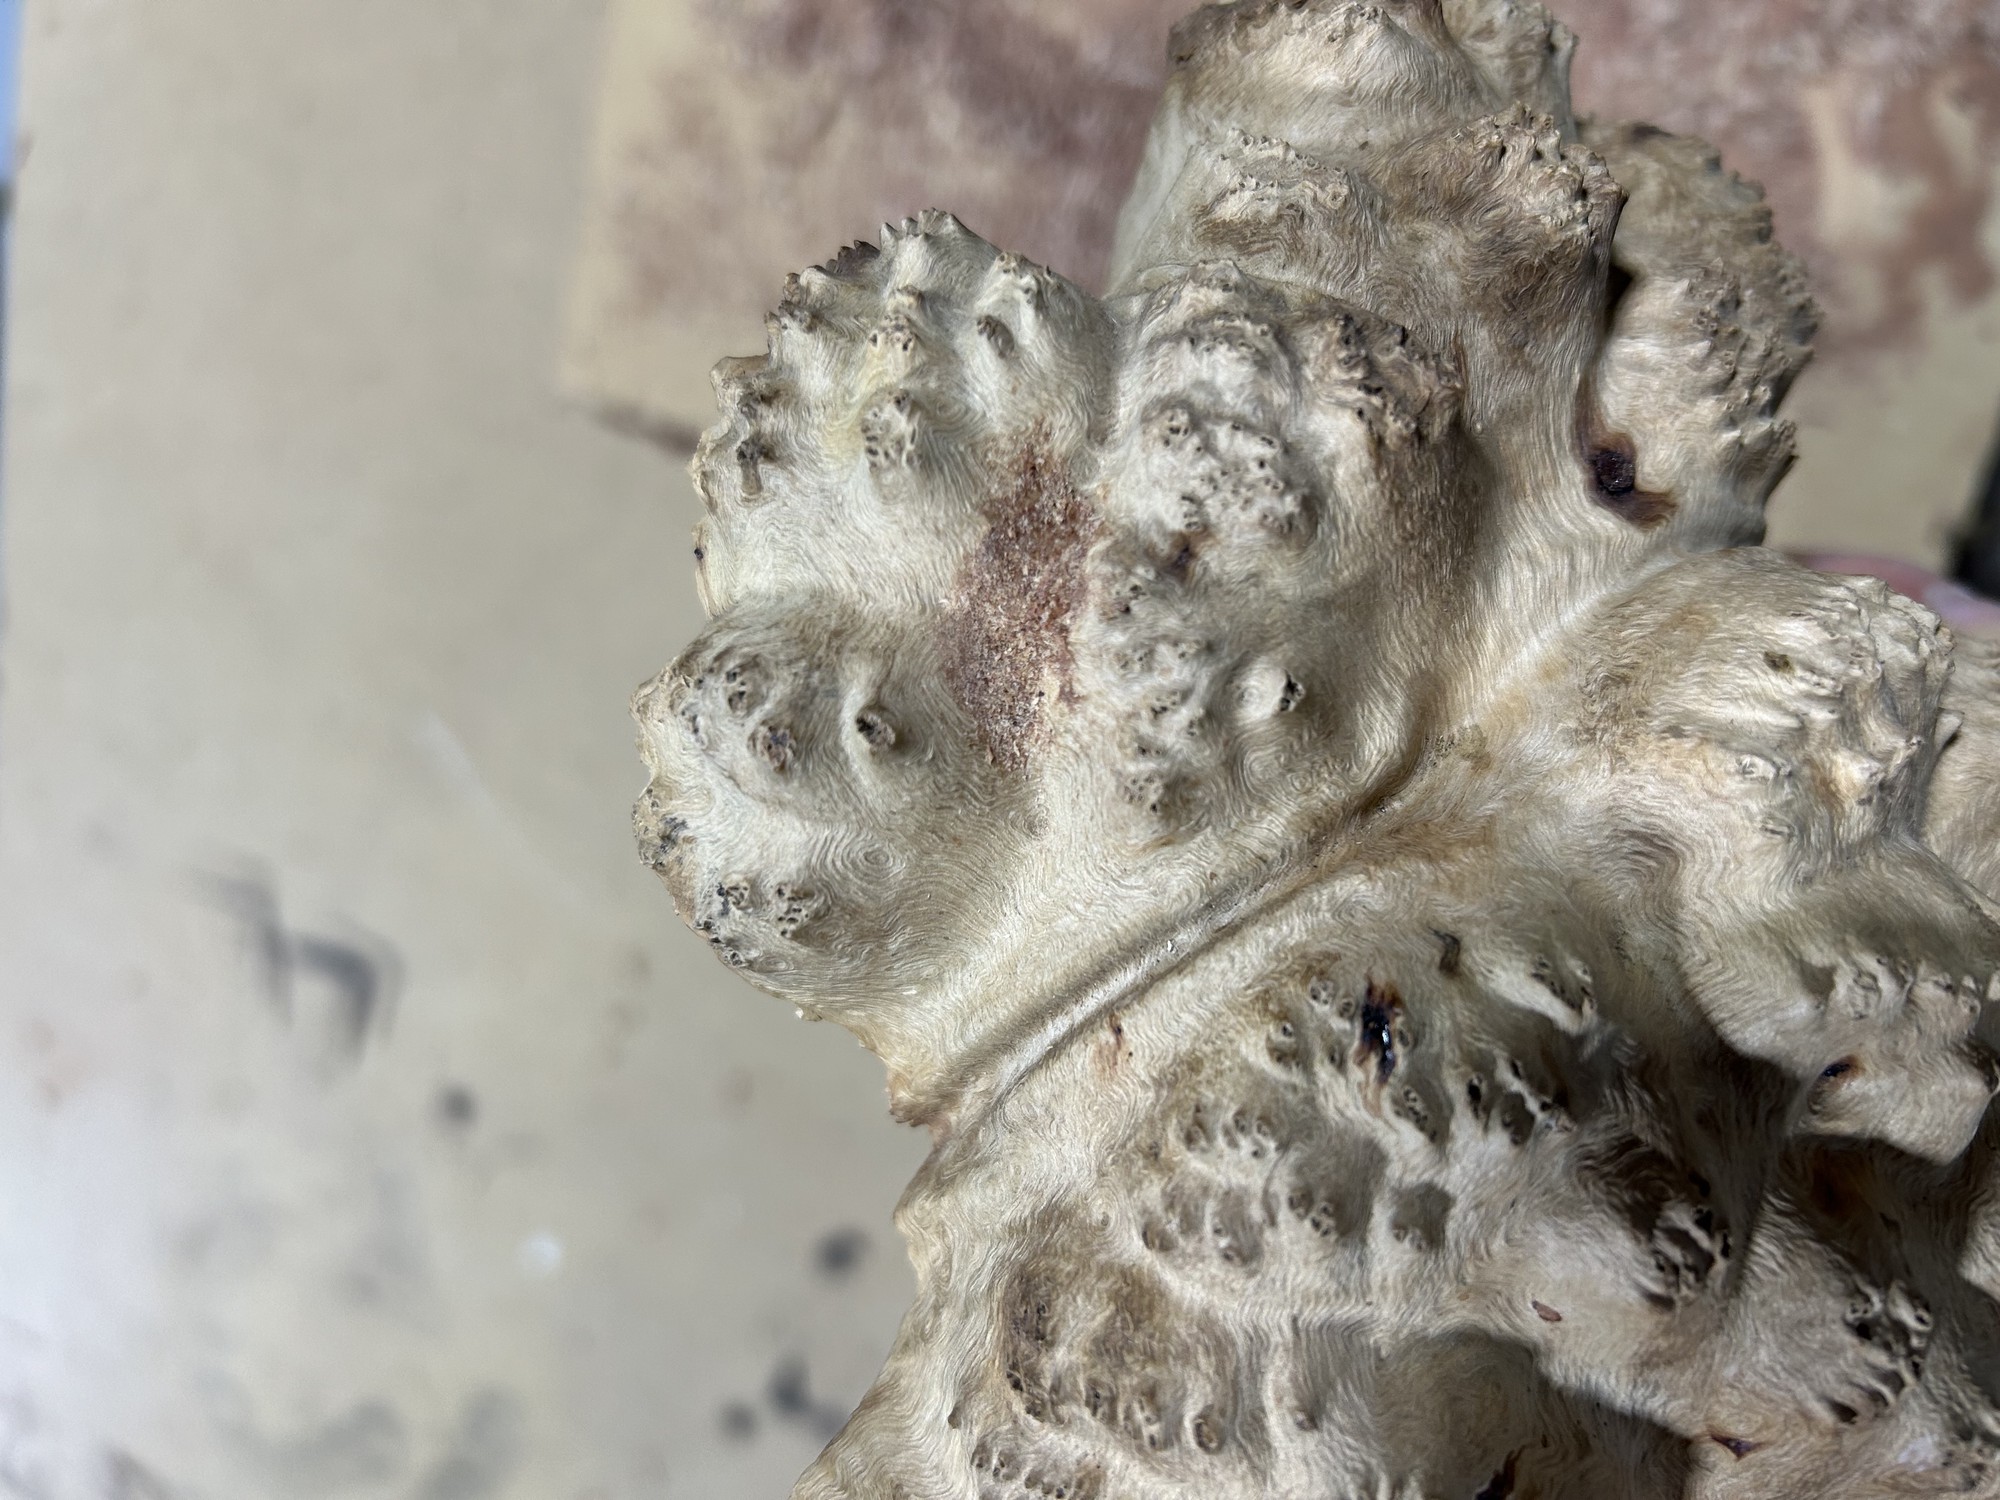
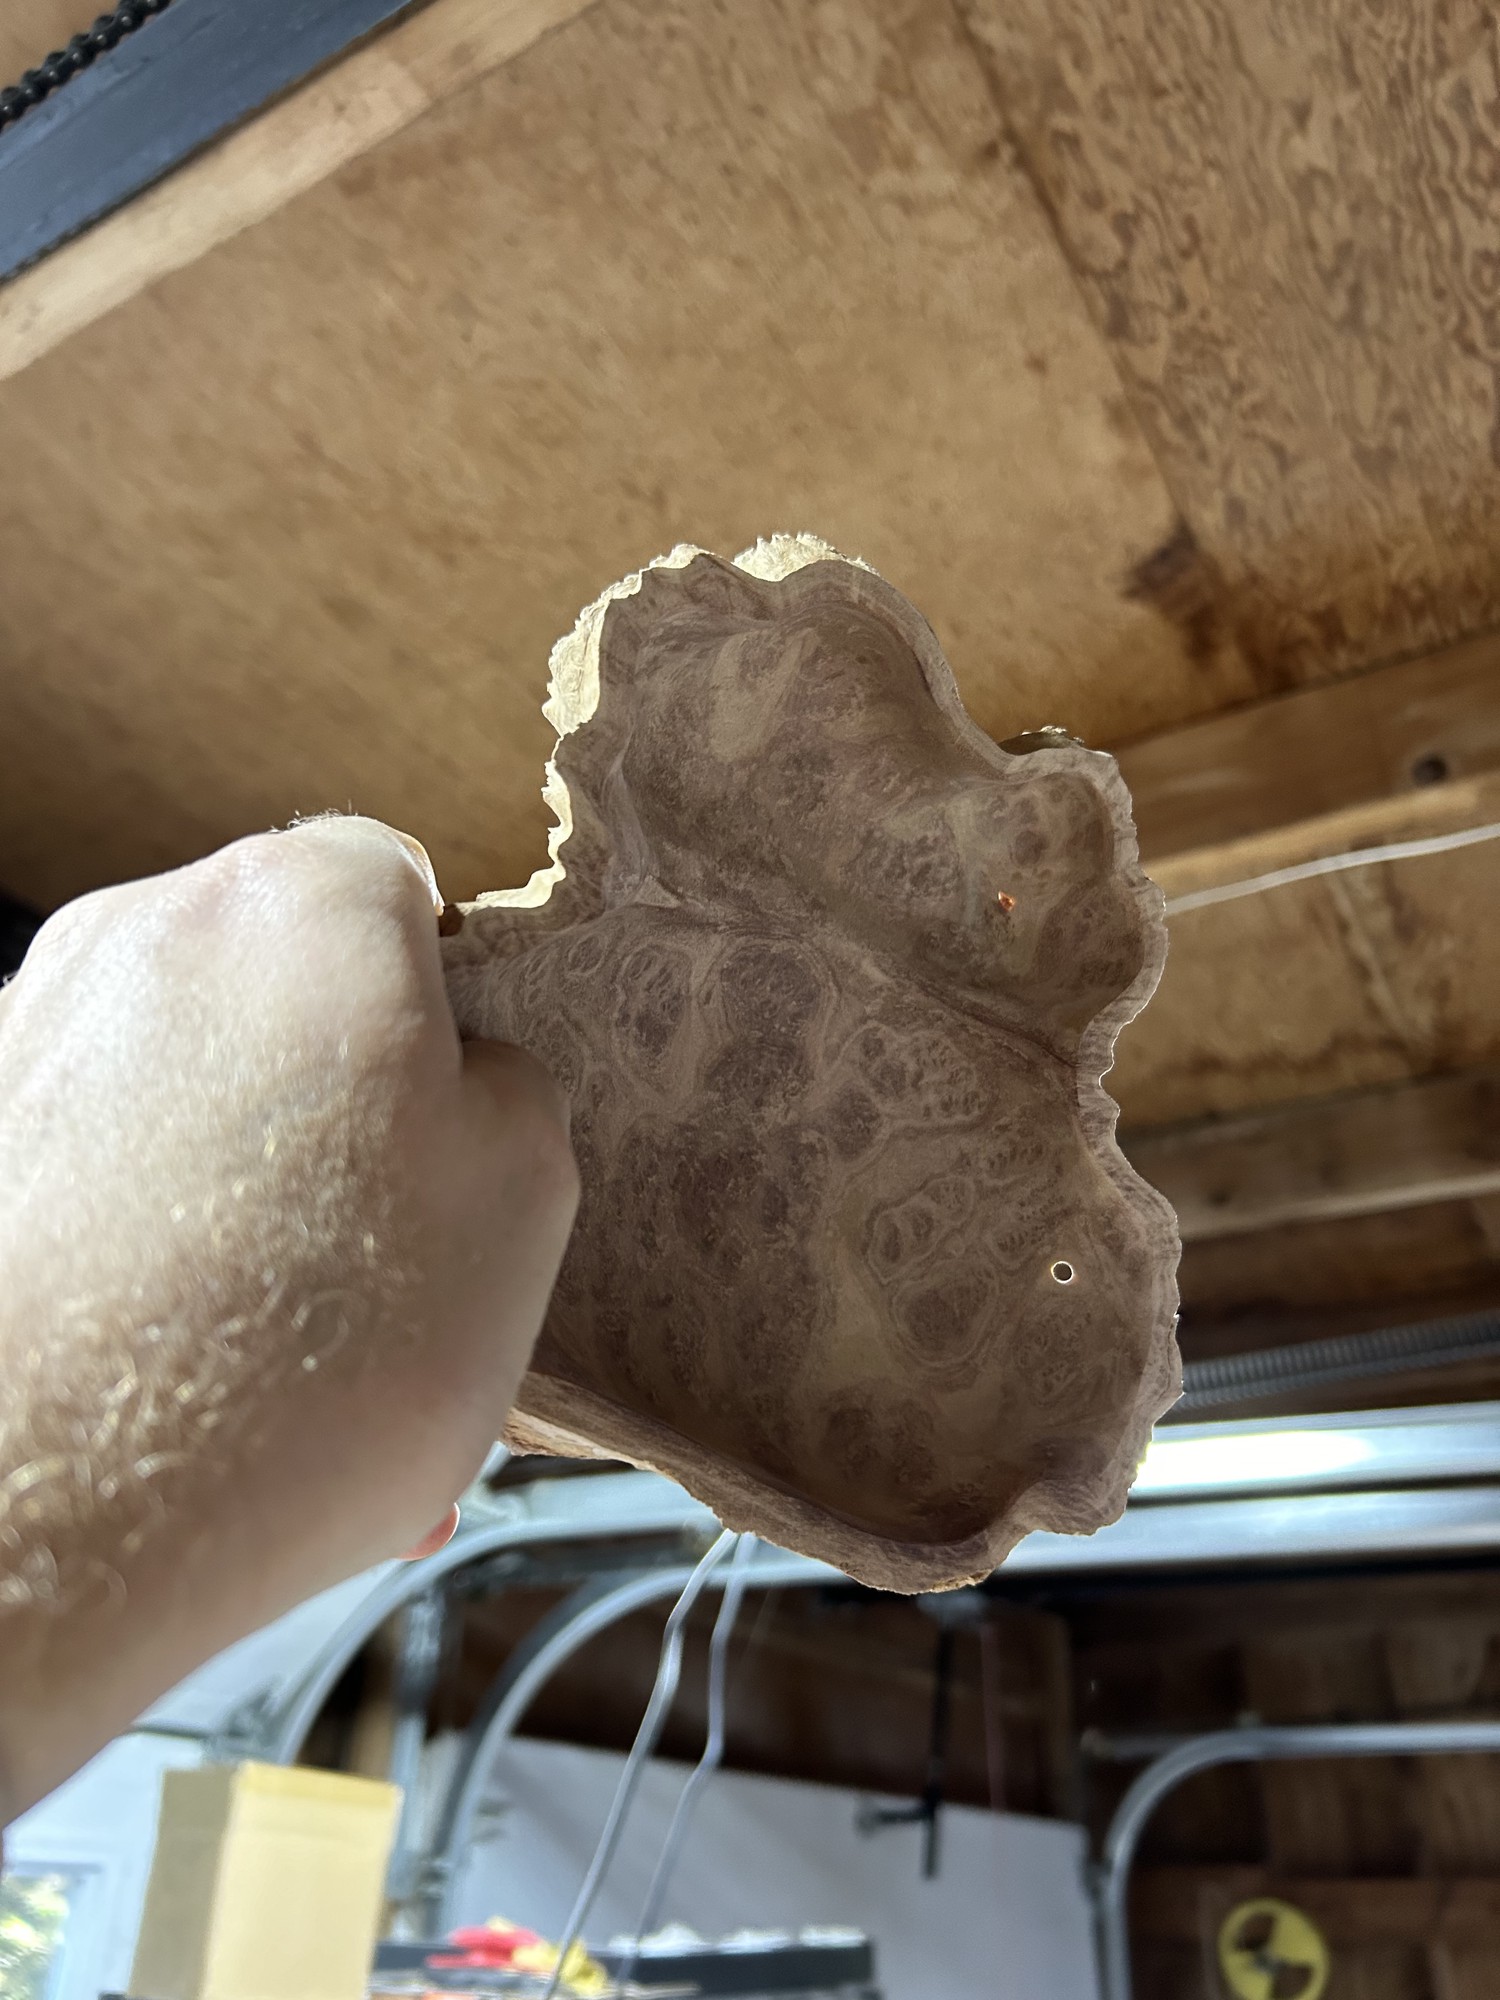
I bought this burl at a Woodcraft store in Boise, Idaho around January 2023. Considering it was my first red mallee wood working project, I was amazed by its grain pattern. I knew it would be tough to carve considering its very rugose exterior, but I decided its potential was worth it. This bowl became a special gift!
Bark Removal
Fortunately, the stock came with all bark removed so there was no bark removal process for this bowl.
Carving
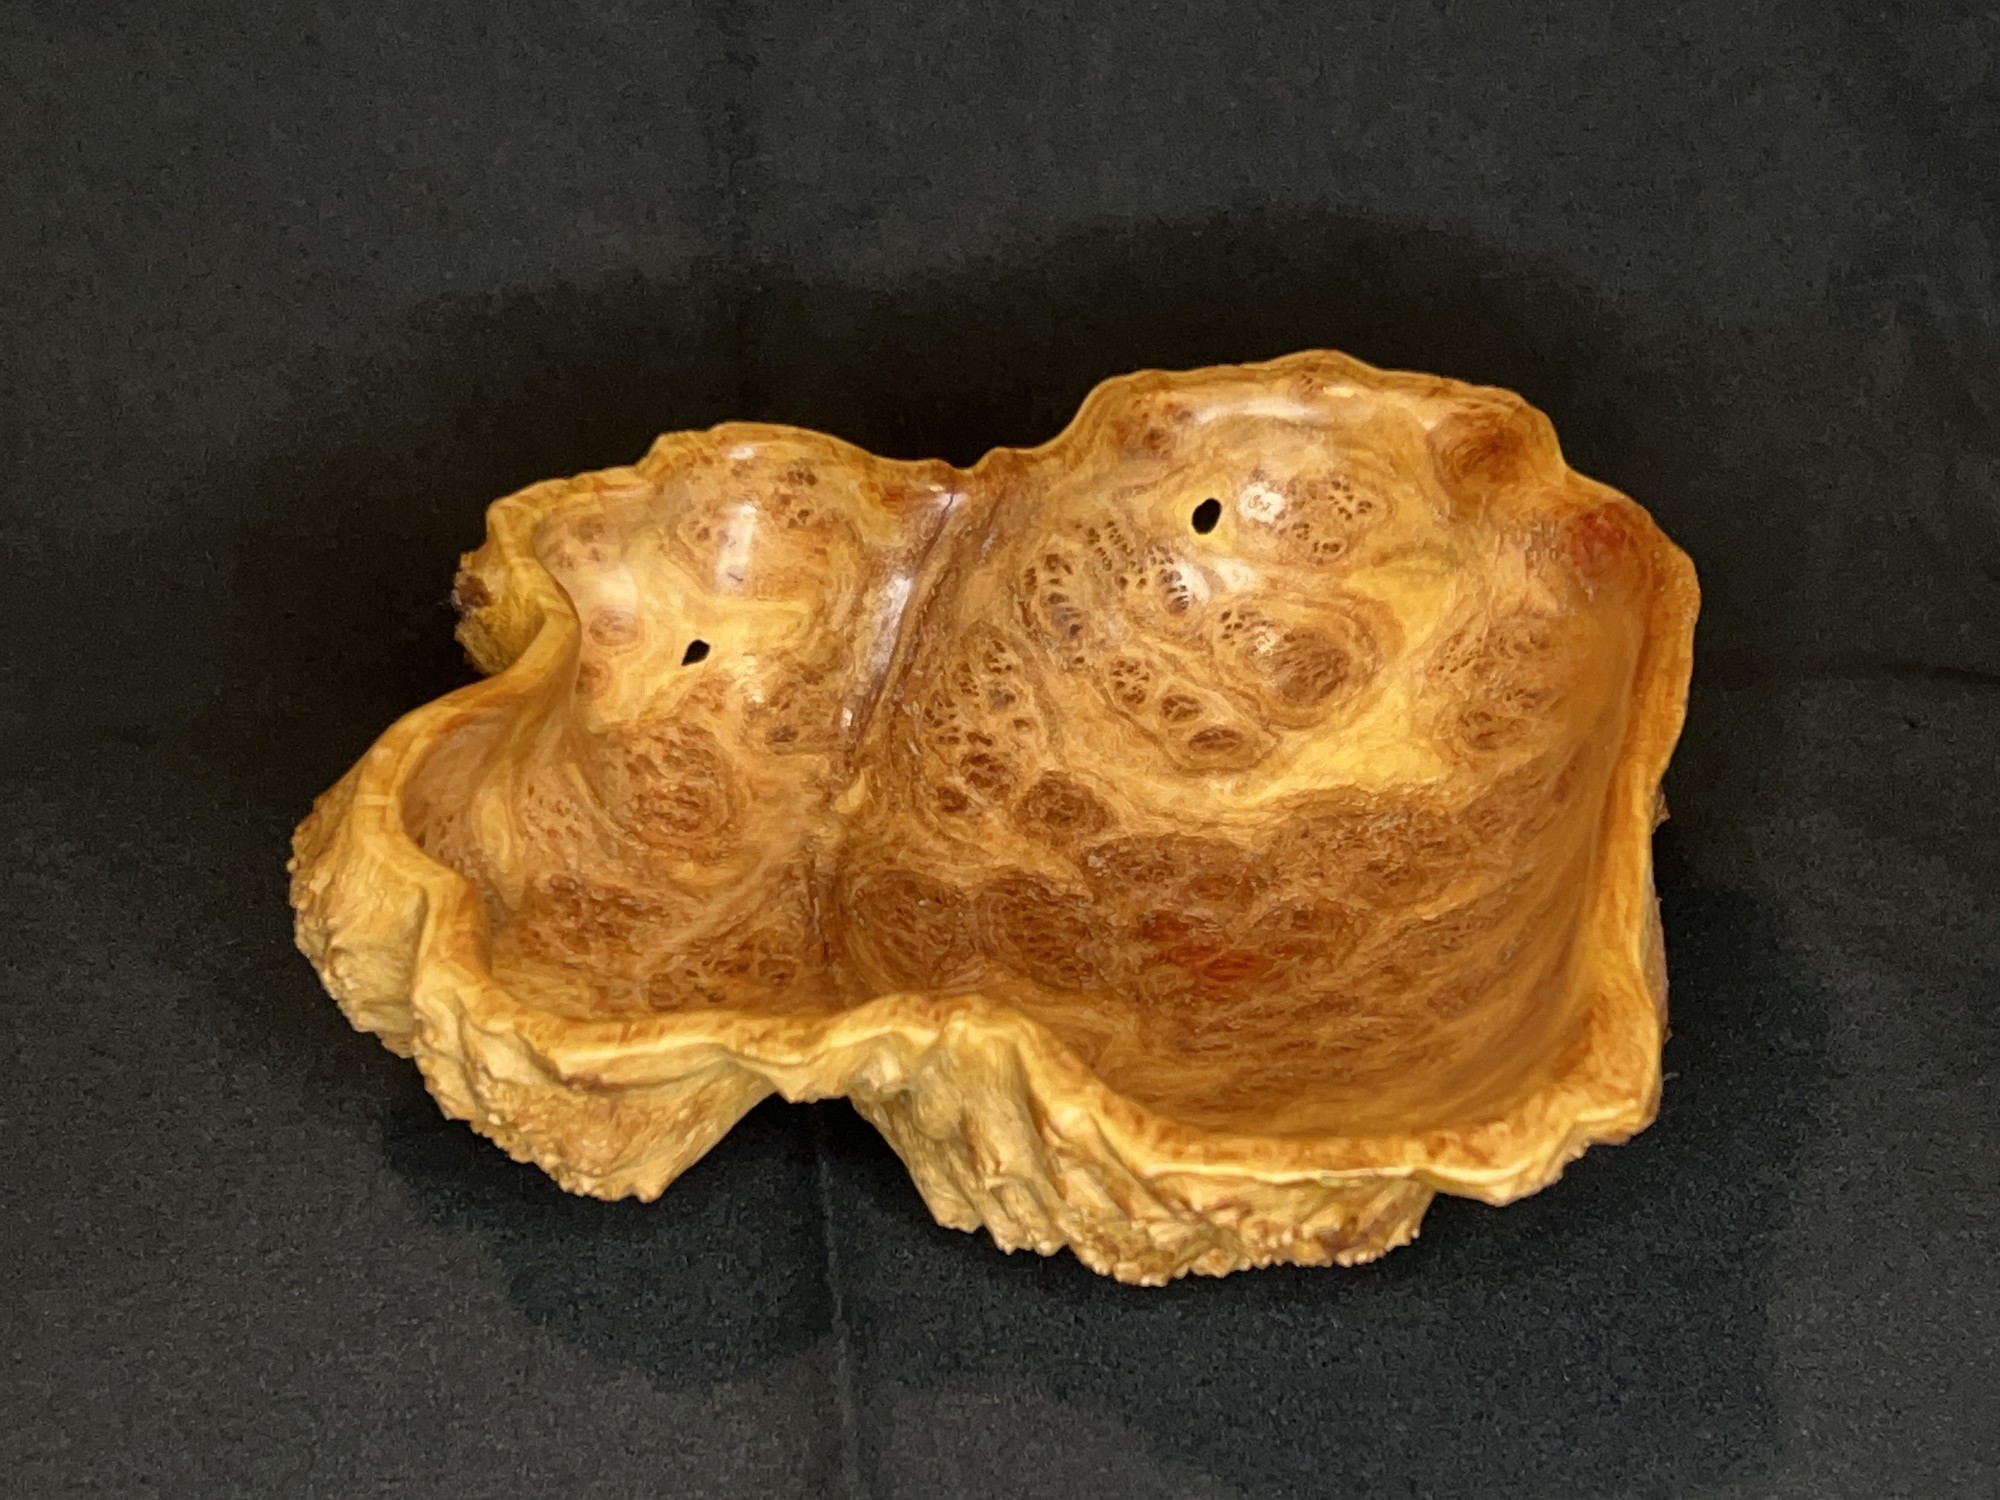
Hollowing this bowl was a delicate process as the rugose exterior made it exremely difficult to tell the true the thickness of the sides of the bowl as it was being hollowed.
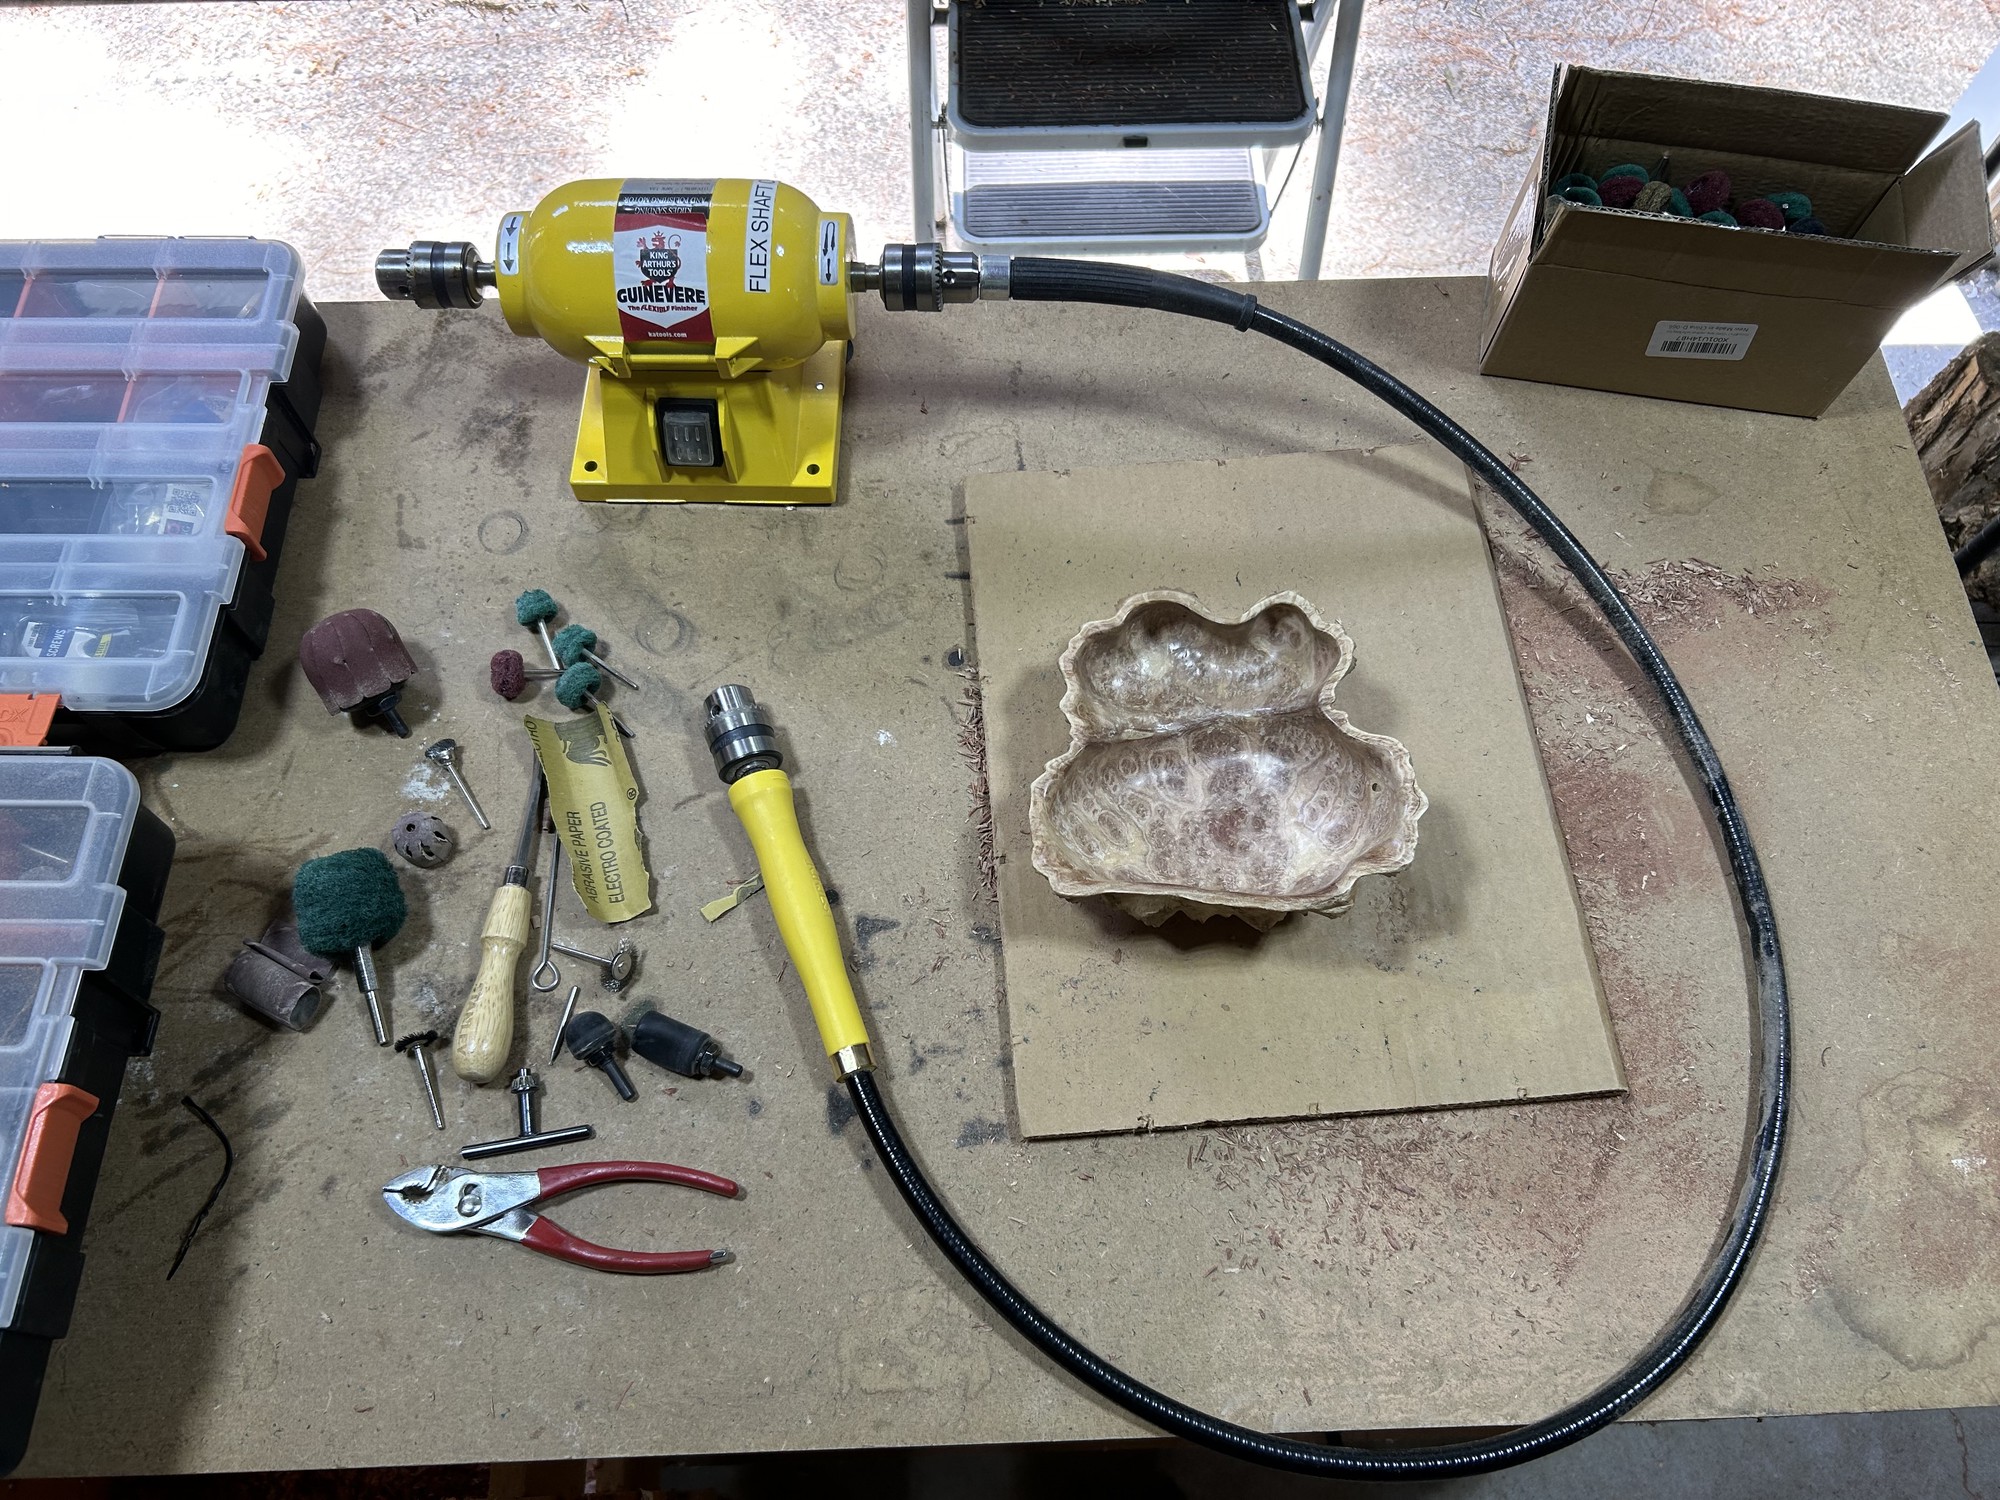
I started with the Orbicut 40 bit1 in large areas and the Orbicut 20 bit2, Kutzall sphere burr (1/4" shaft) 3 and Kutzall rotor saw burr (3/4" x 1/8")4 in more confined areas to do large scale hollowing of the bowl.
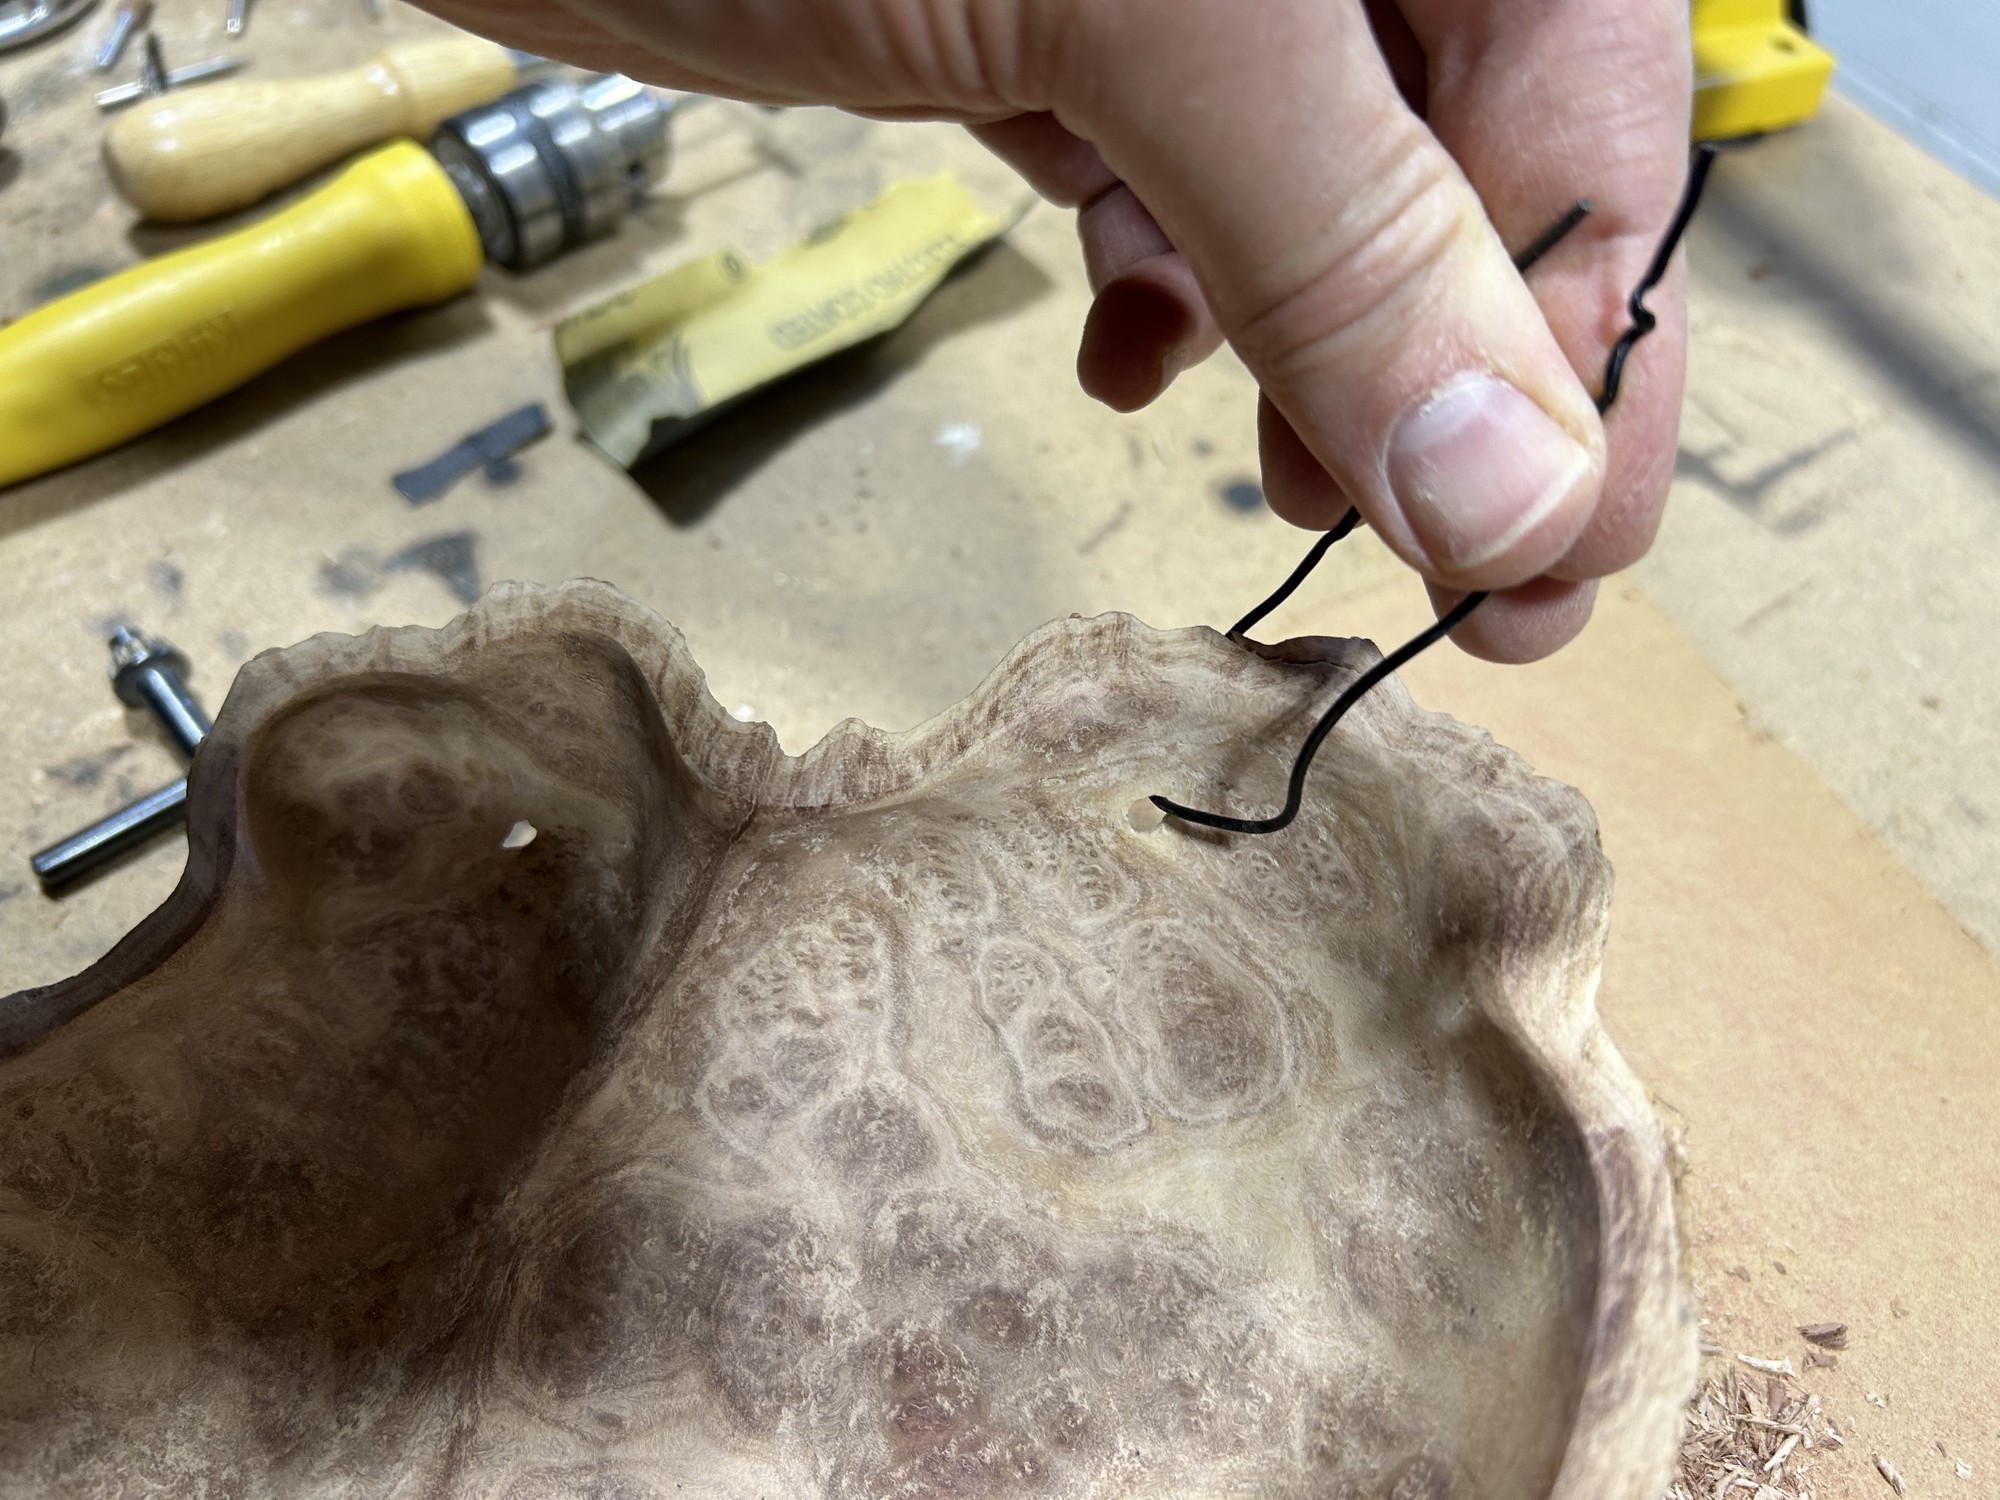
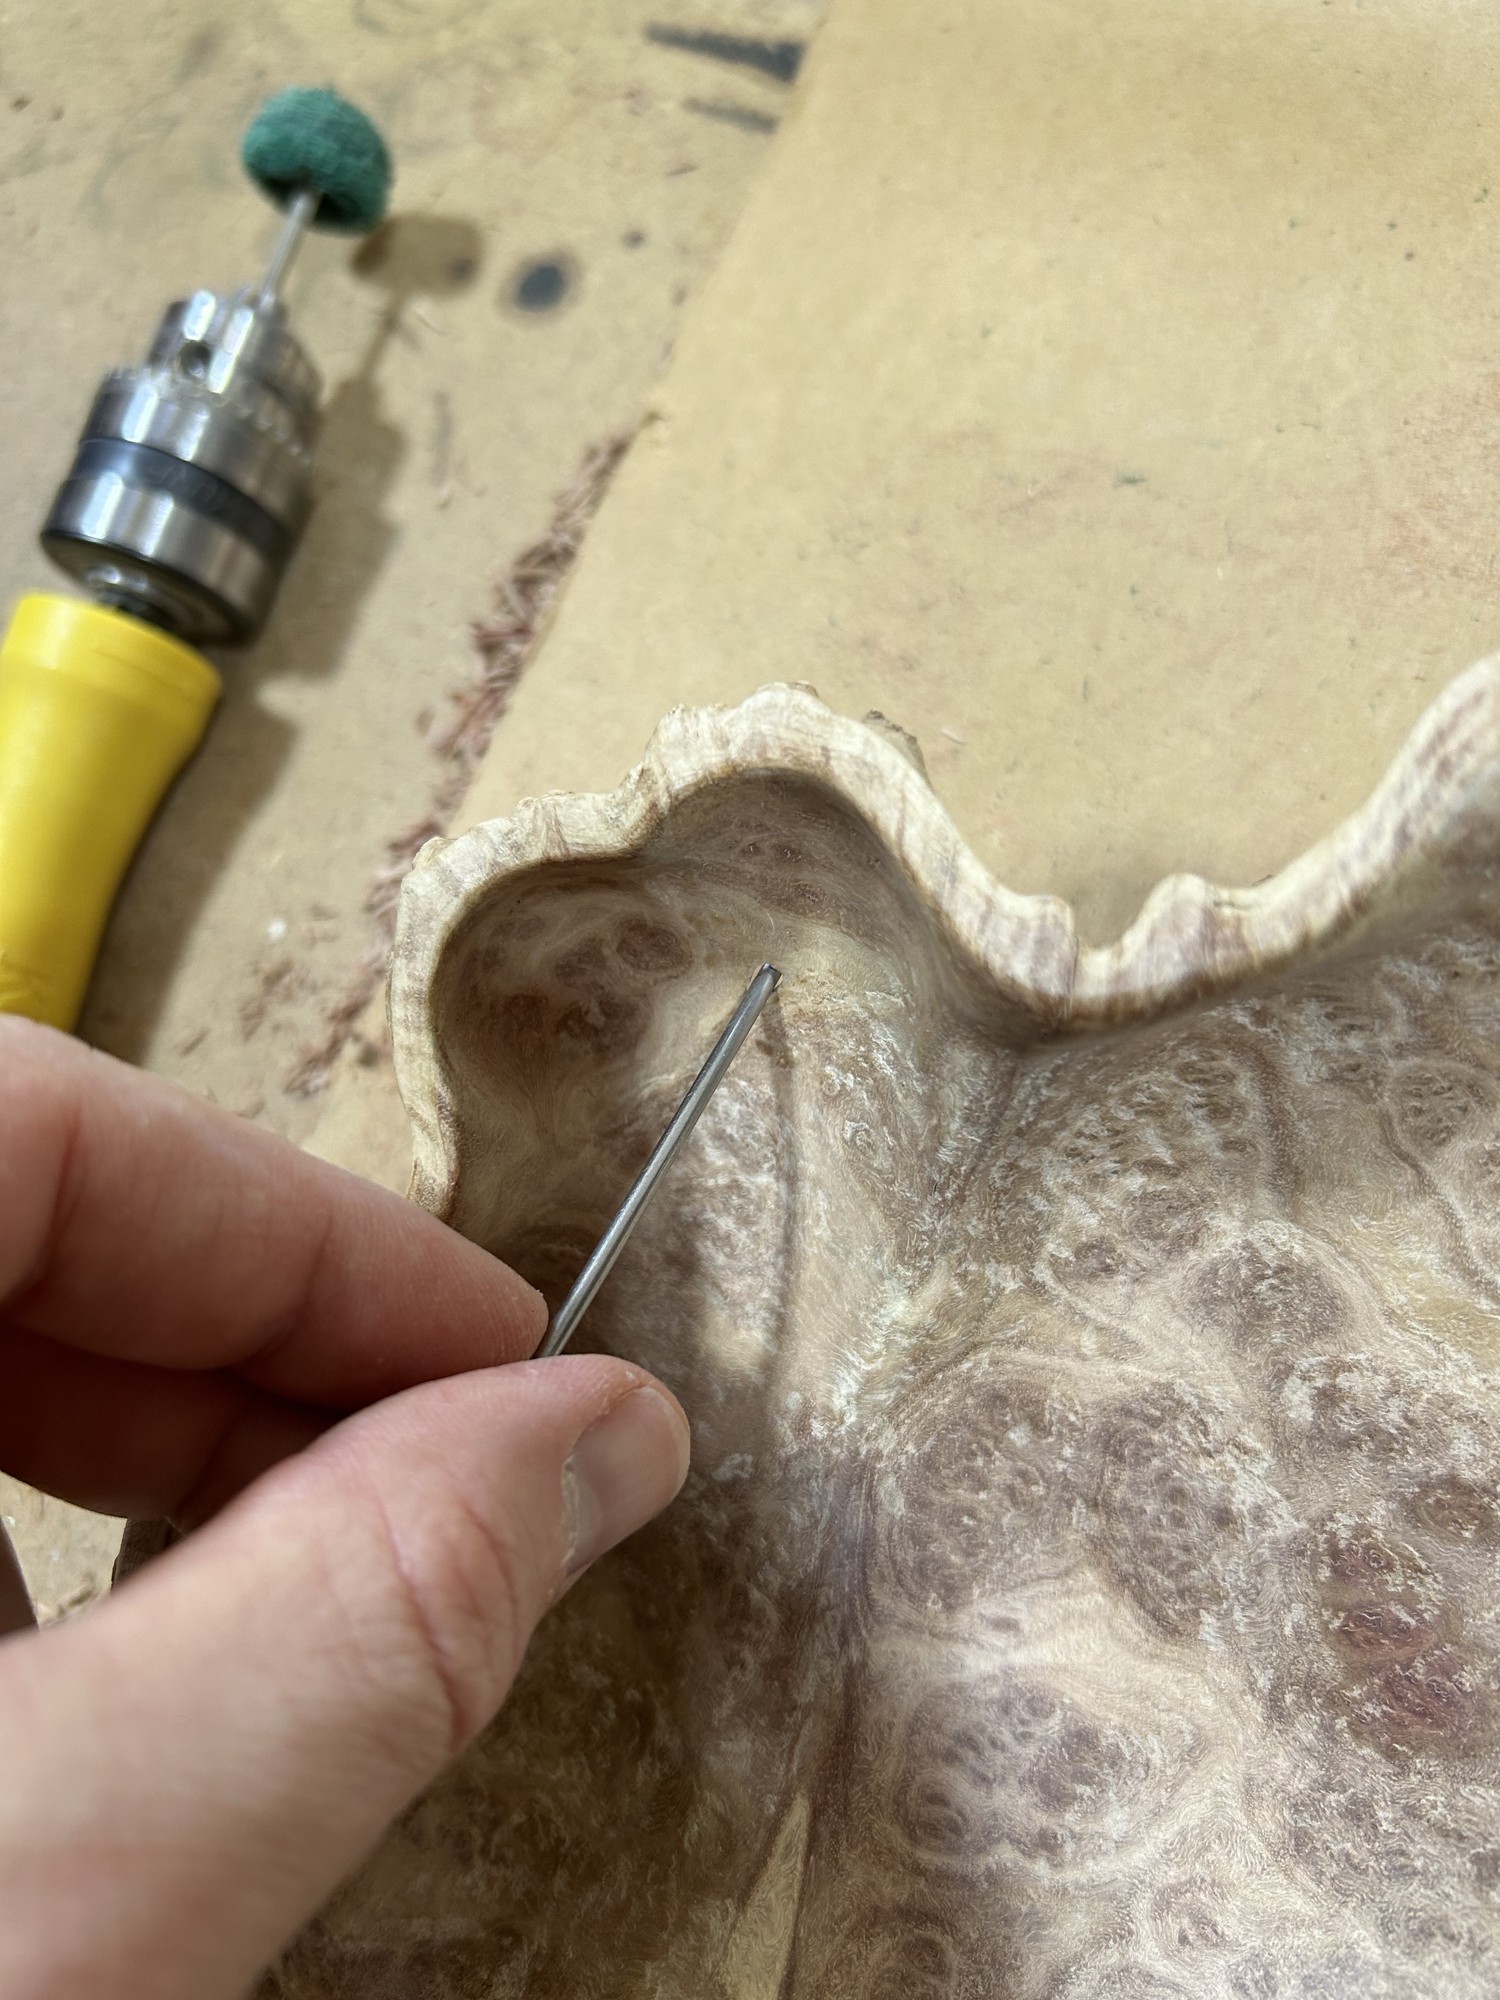
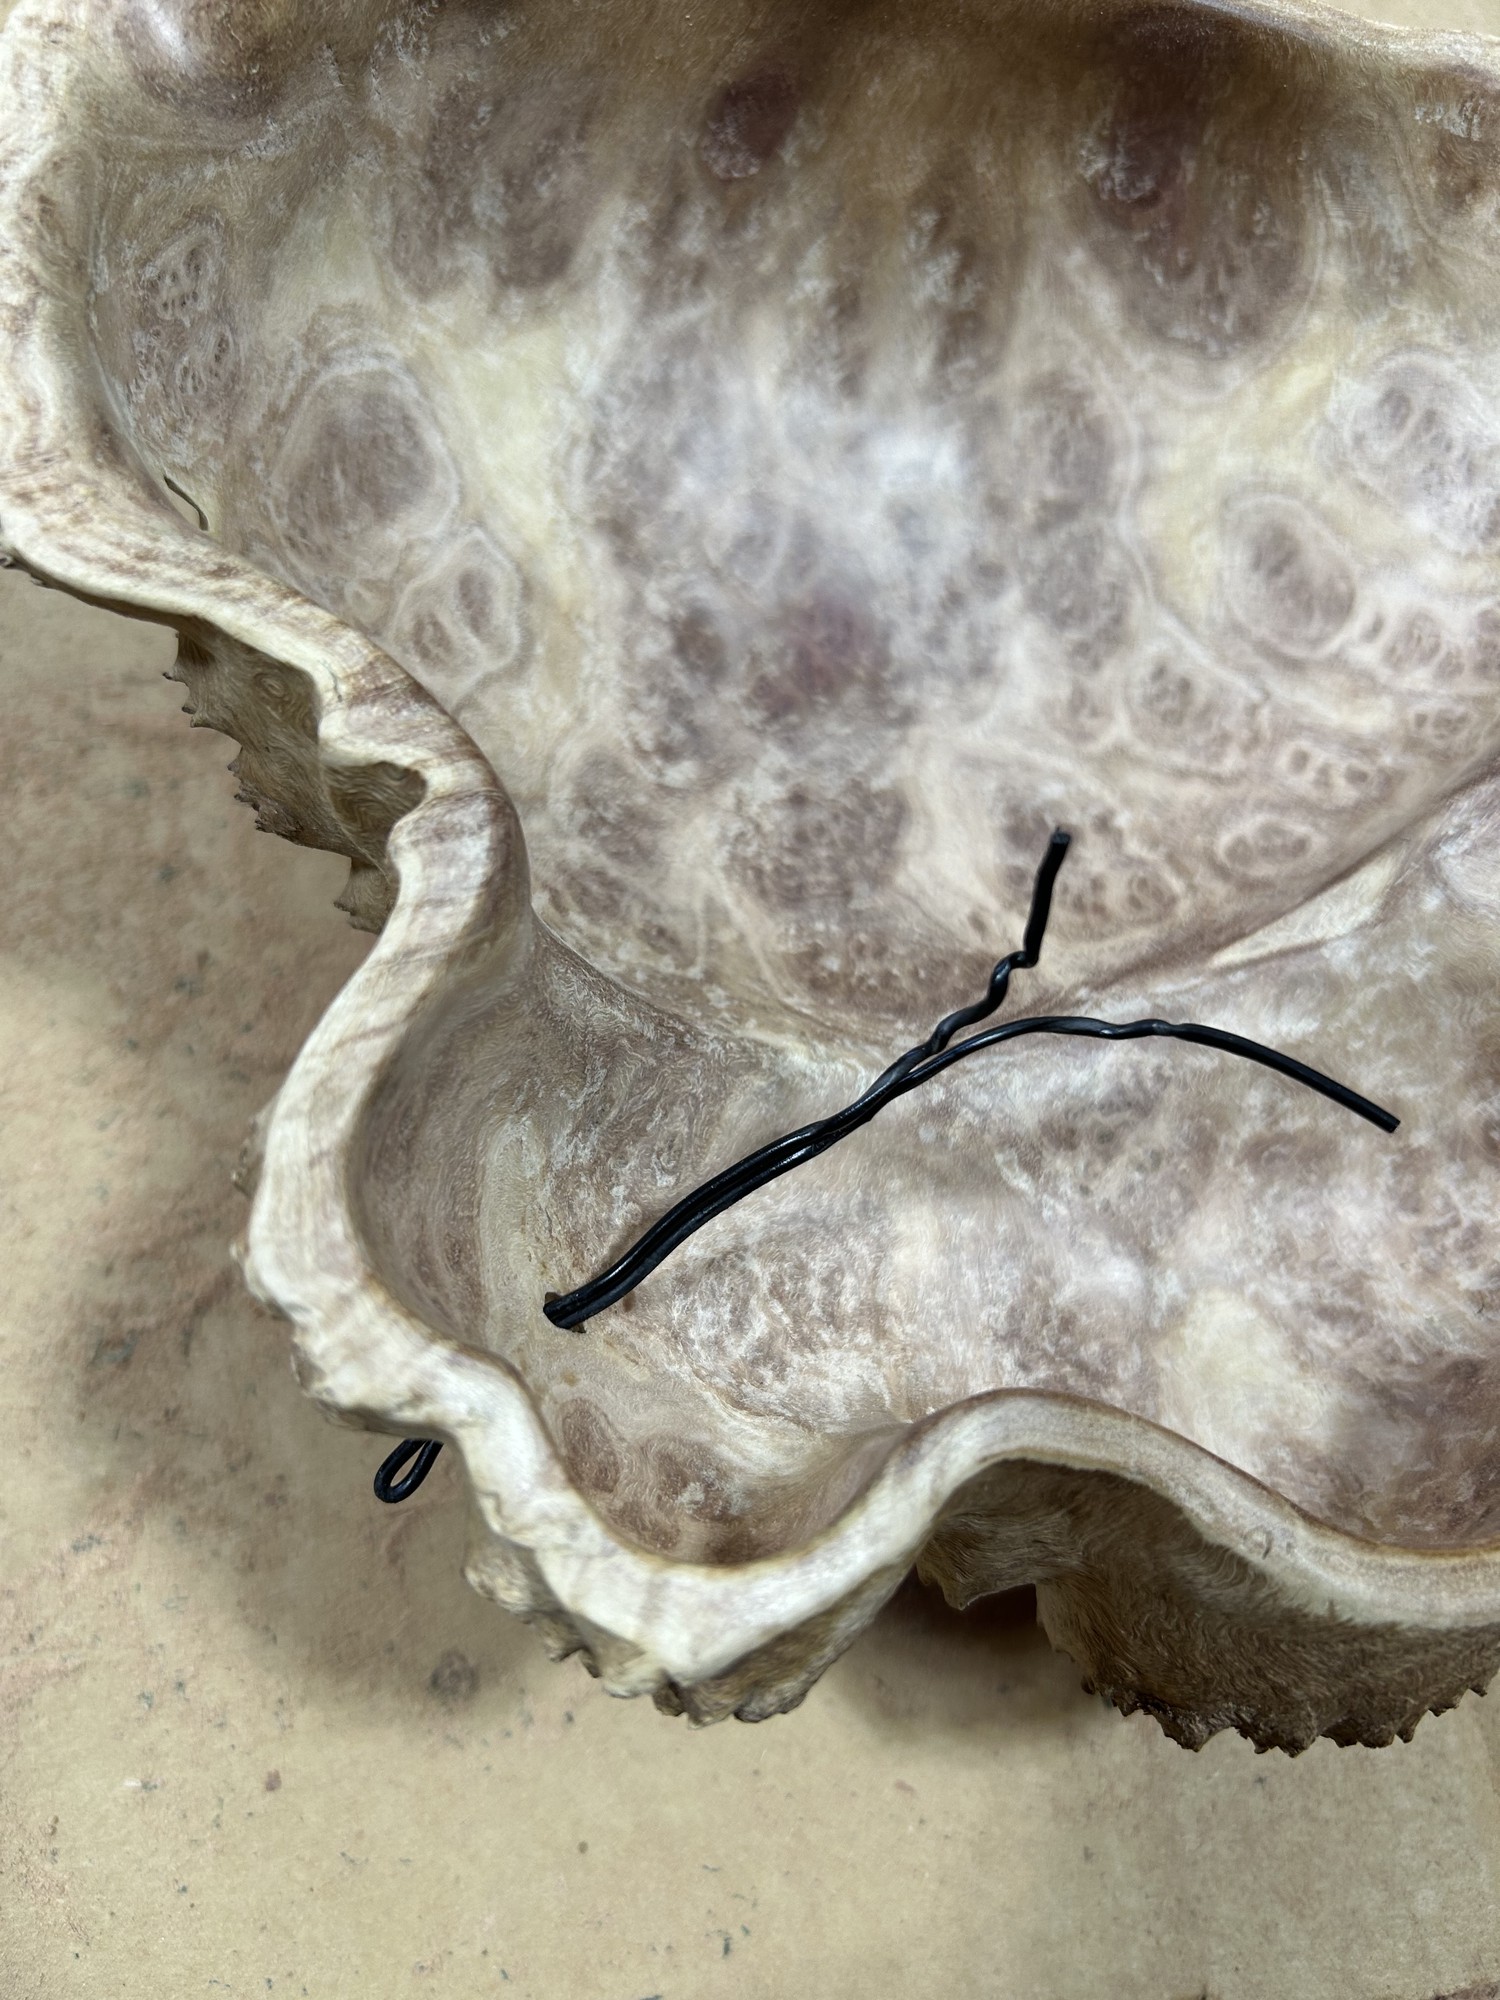
Hole Rework
Unfortunately, I accidentally carved two holes into the side of the bowl where I wasn’t able to easily tell the thickness due to the bowls exterior. I attempted to fill these holes using a mixture of Elmer’s Woodglue5 and sawdust from the bowl.
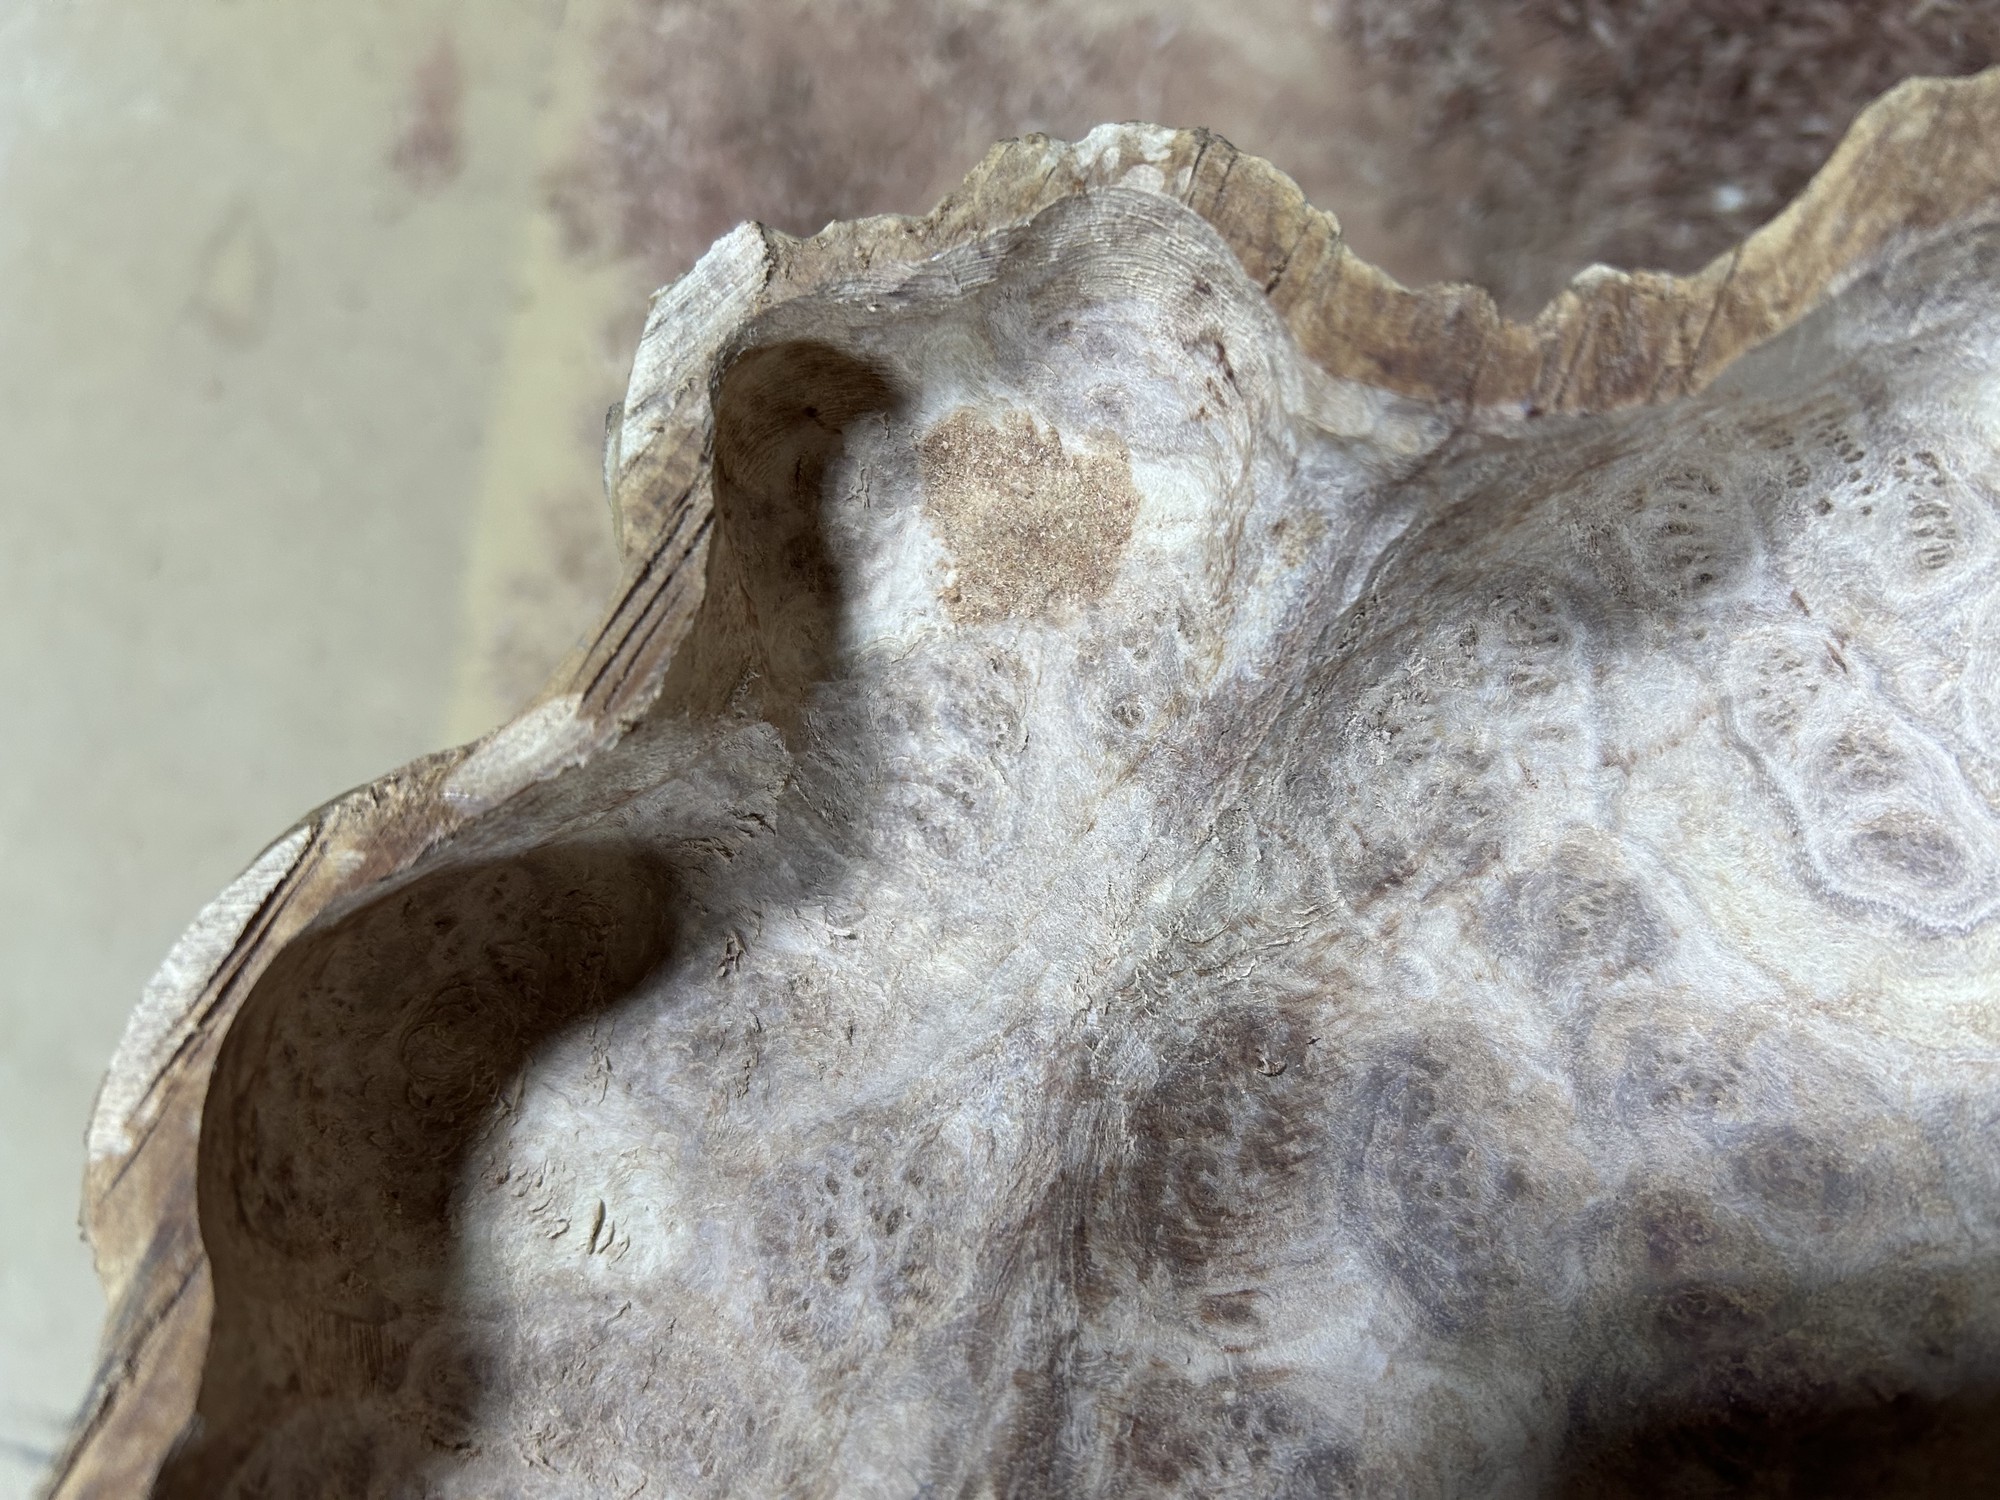
Despite my best efforst, after careful sanding over the cured fill, the holes contrasted starkly with the surrounding wood and were also incredibly thin.
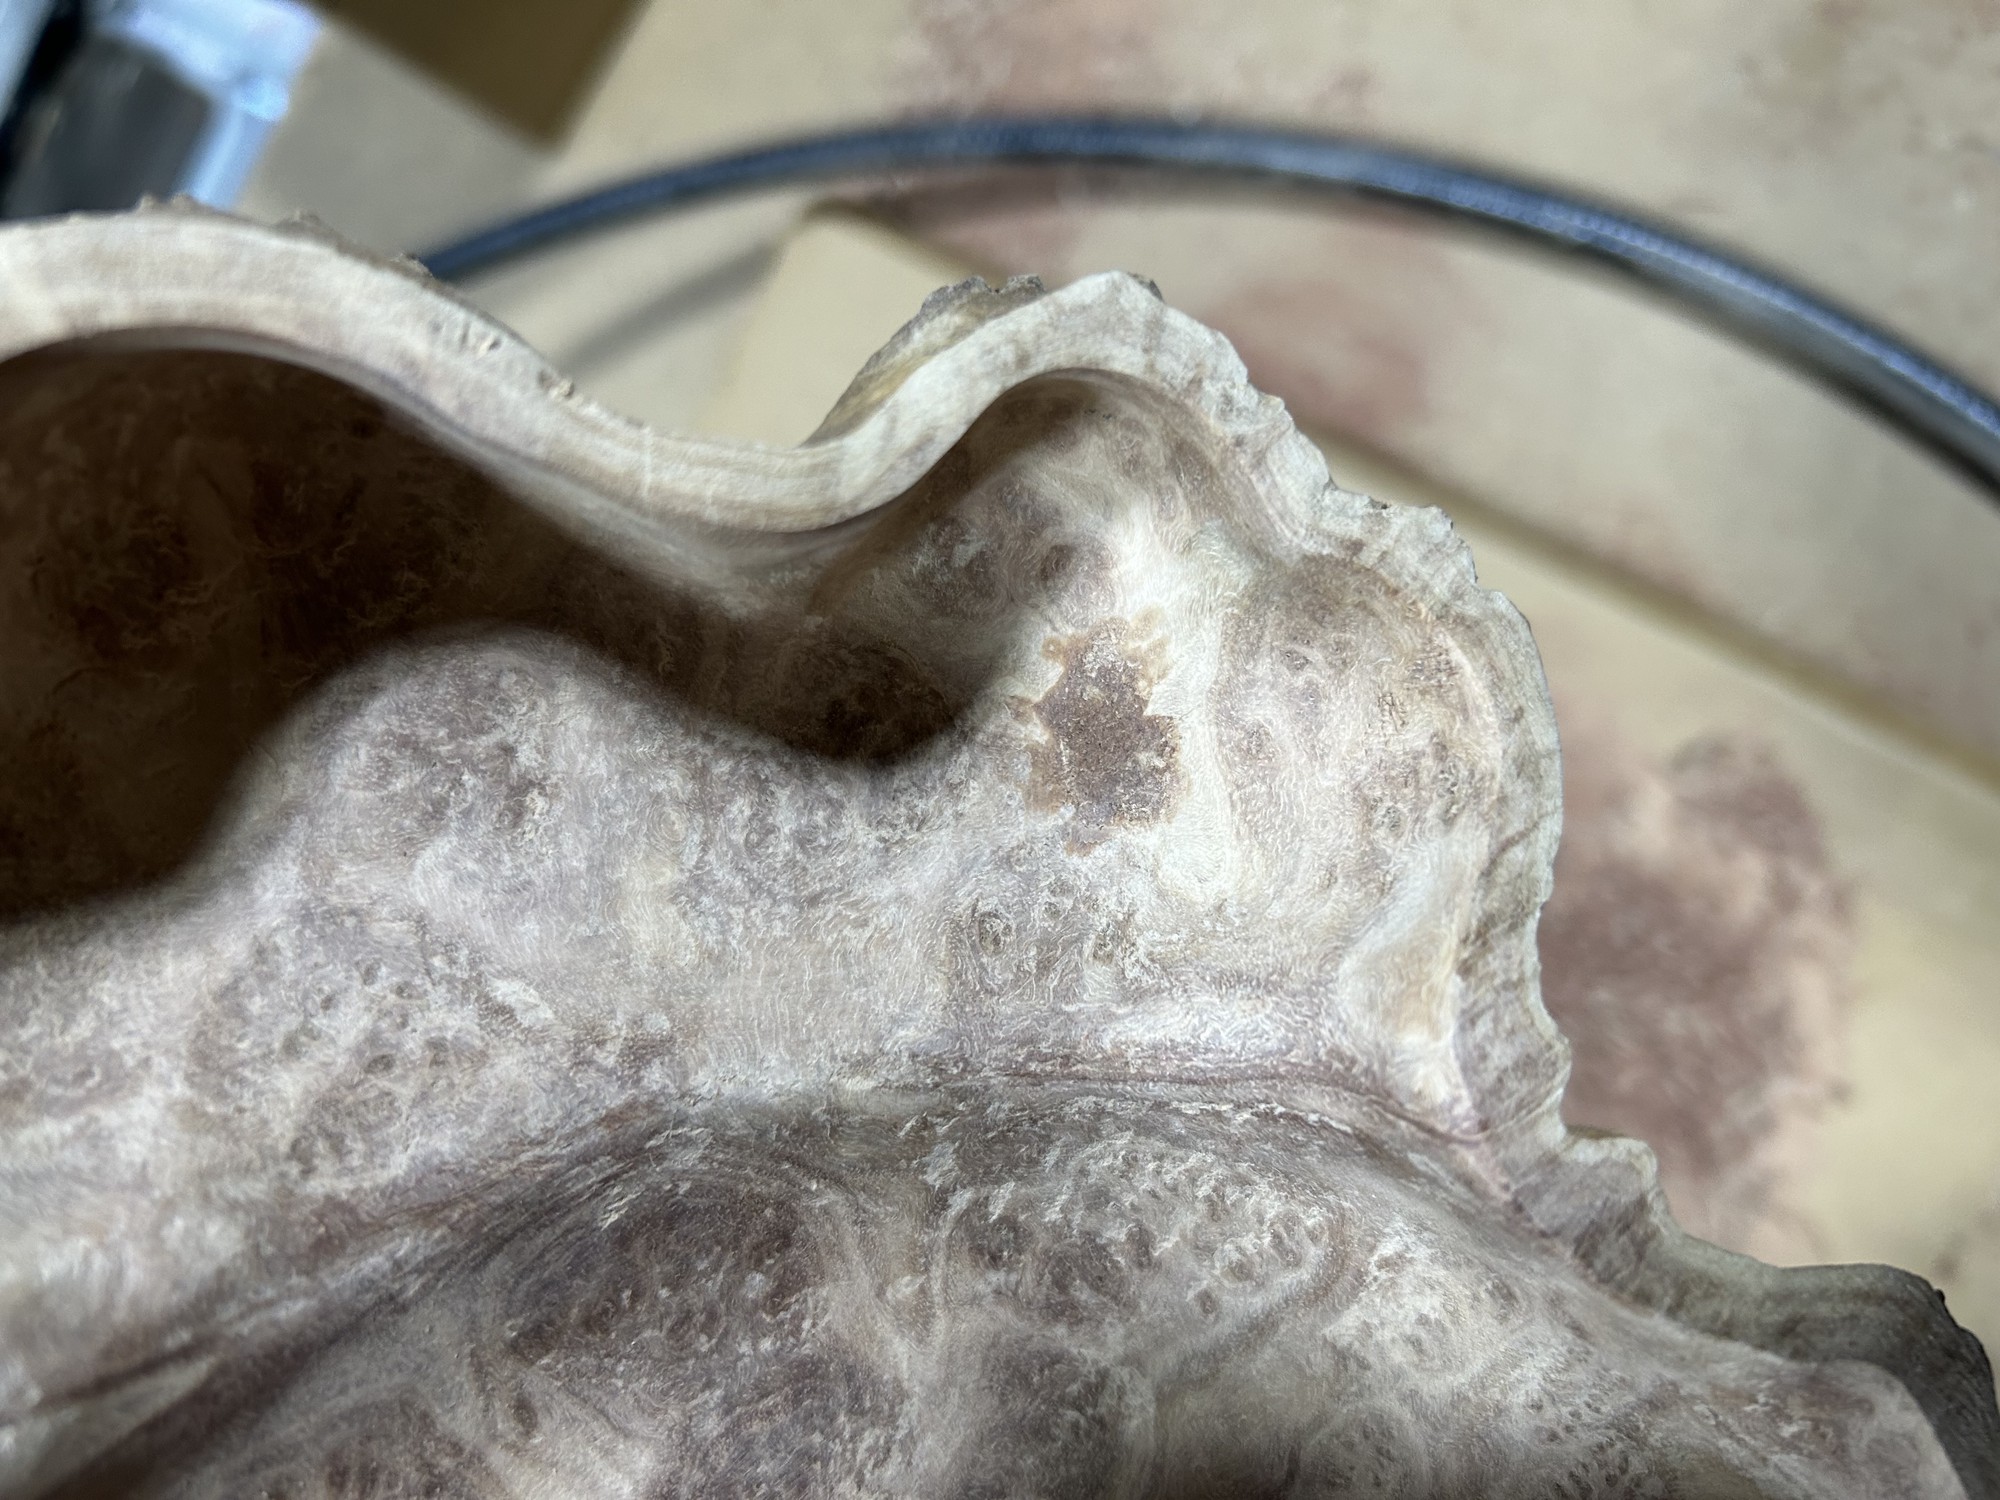
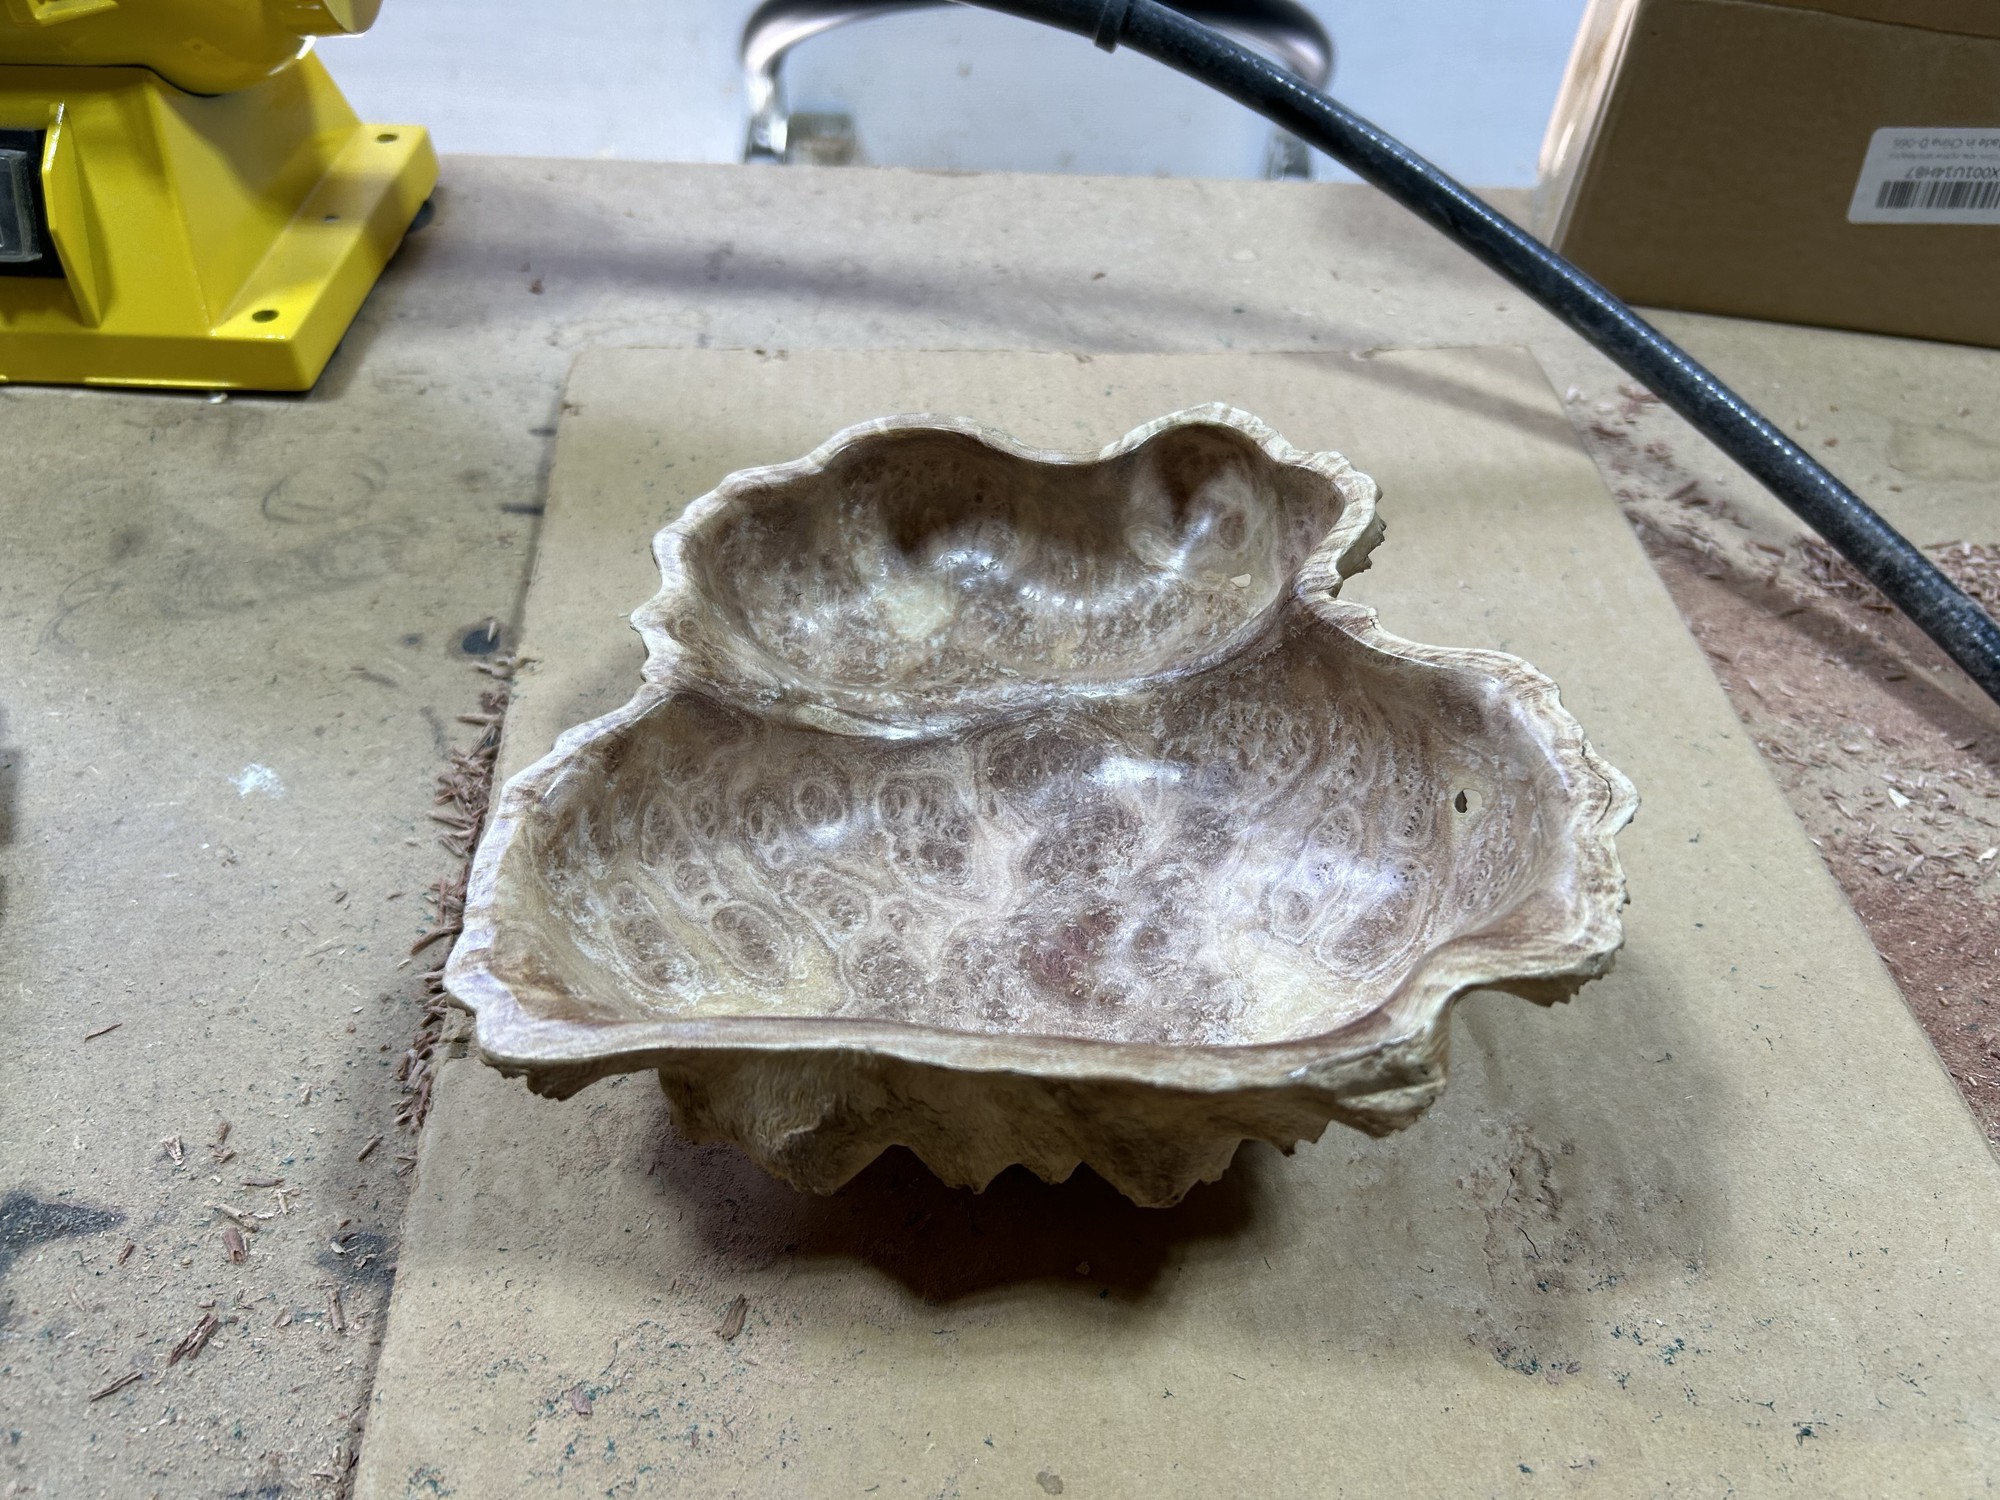
Filling with easily adjustable measures such as glue did not work as desired and more extreme measures such as filling with resin/epoxy seemed destined to the same fate considering how thin the wood was very near to the holes' edges. So, I opted to embrace the organic nature of woodworking and accept the holes as features rather than flaws. To make sure the edge of each hole was robust to snagging or chipping I burnished the edge of each hole by rubbing a combination of bare metal and plastic-coated wires against the edge of each hole.
Inner Finish Work
Sanding
Next, I moved on to sanding the inner surface of the burl to even out the divots formed from the hollowing process.
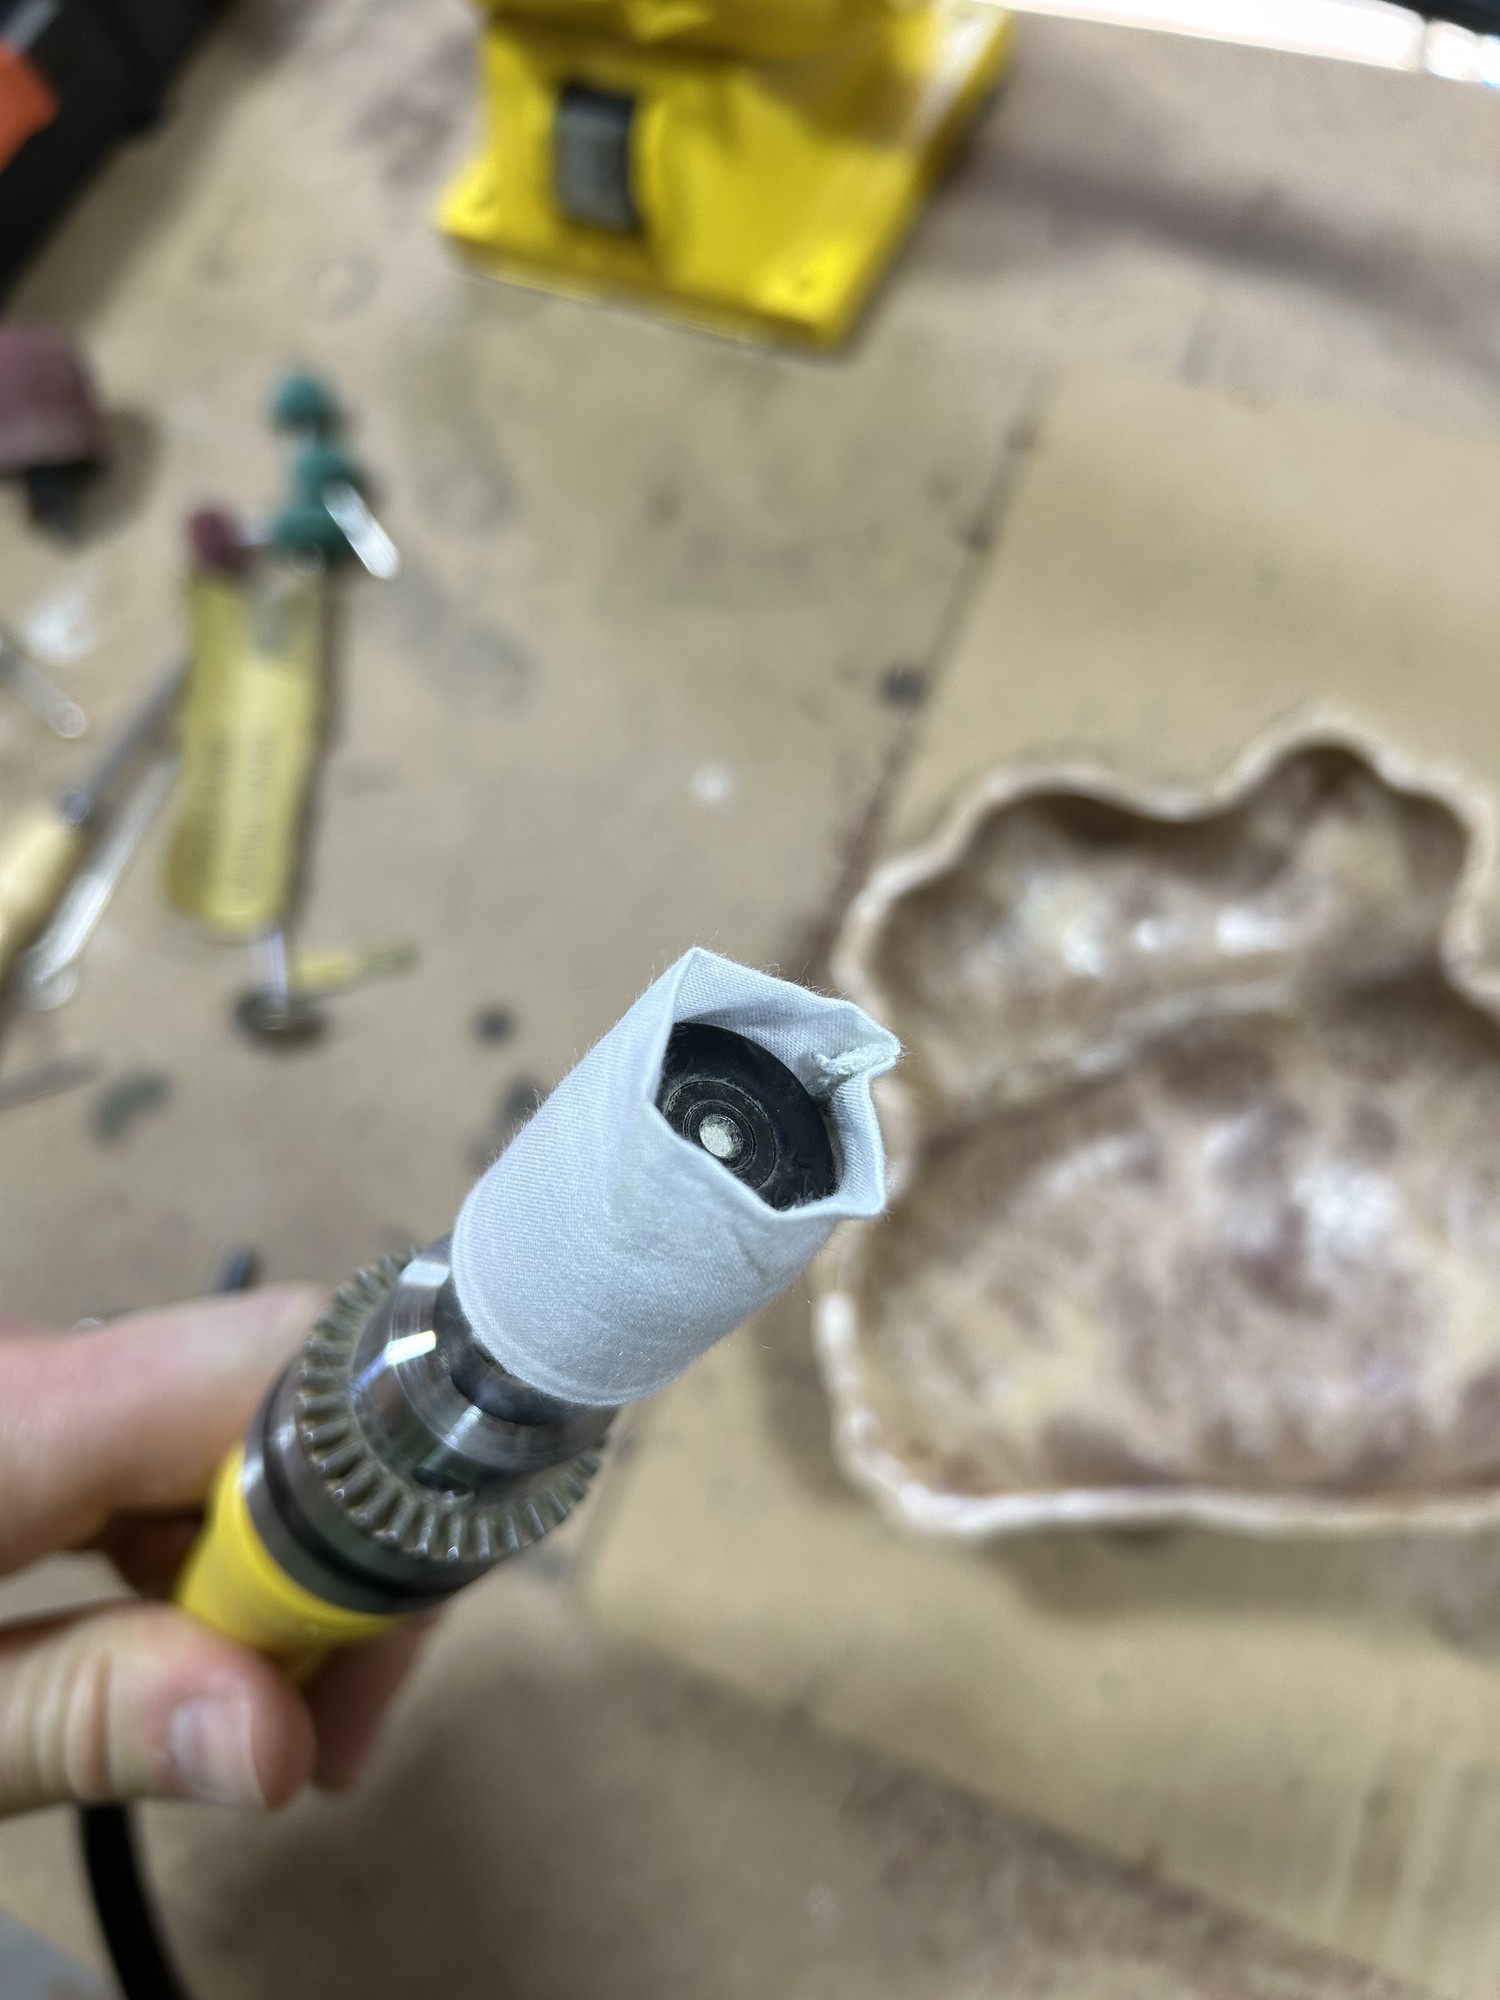
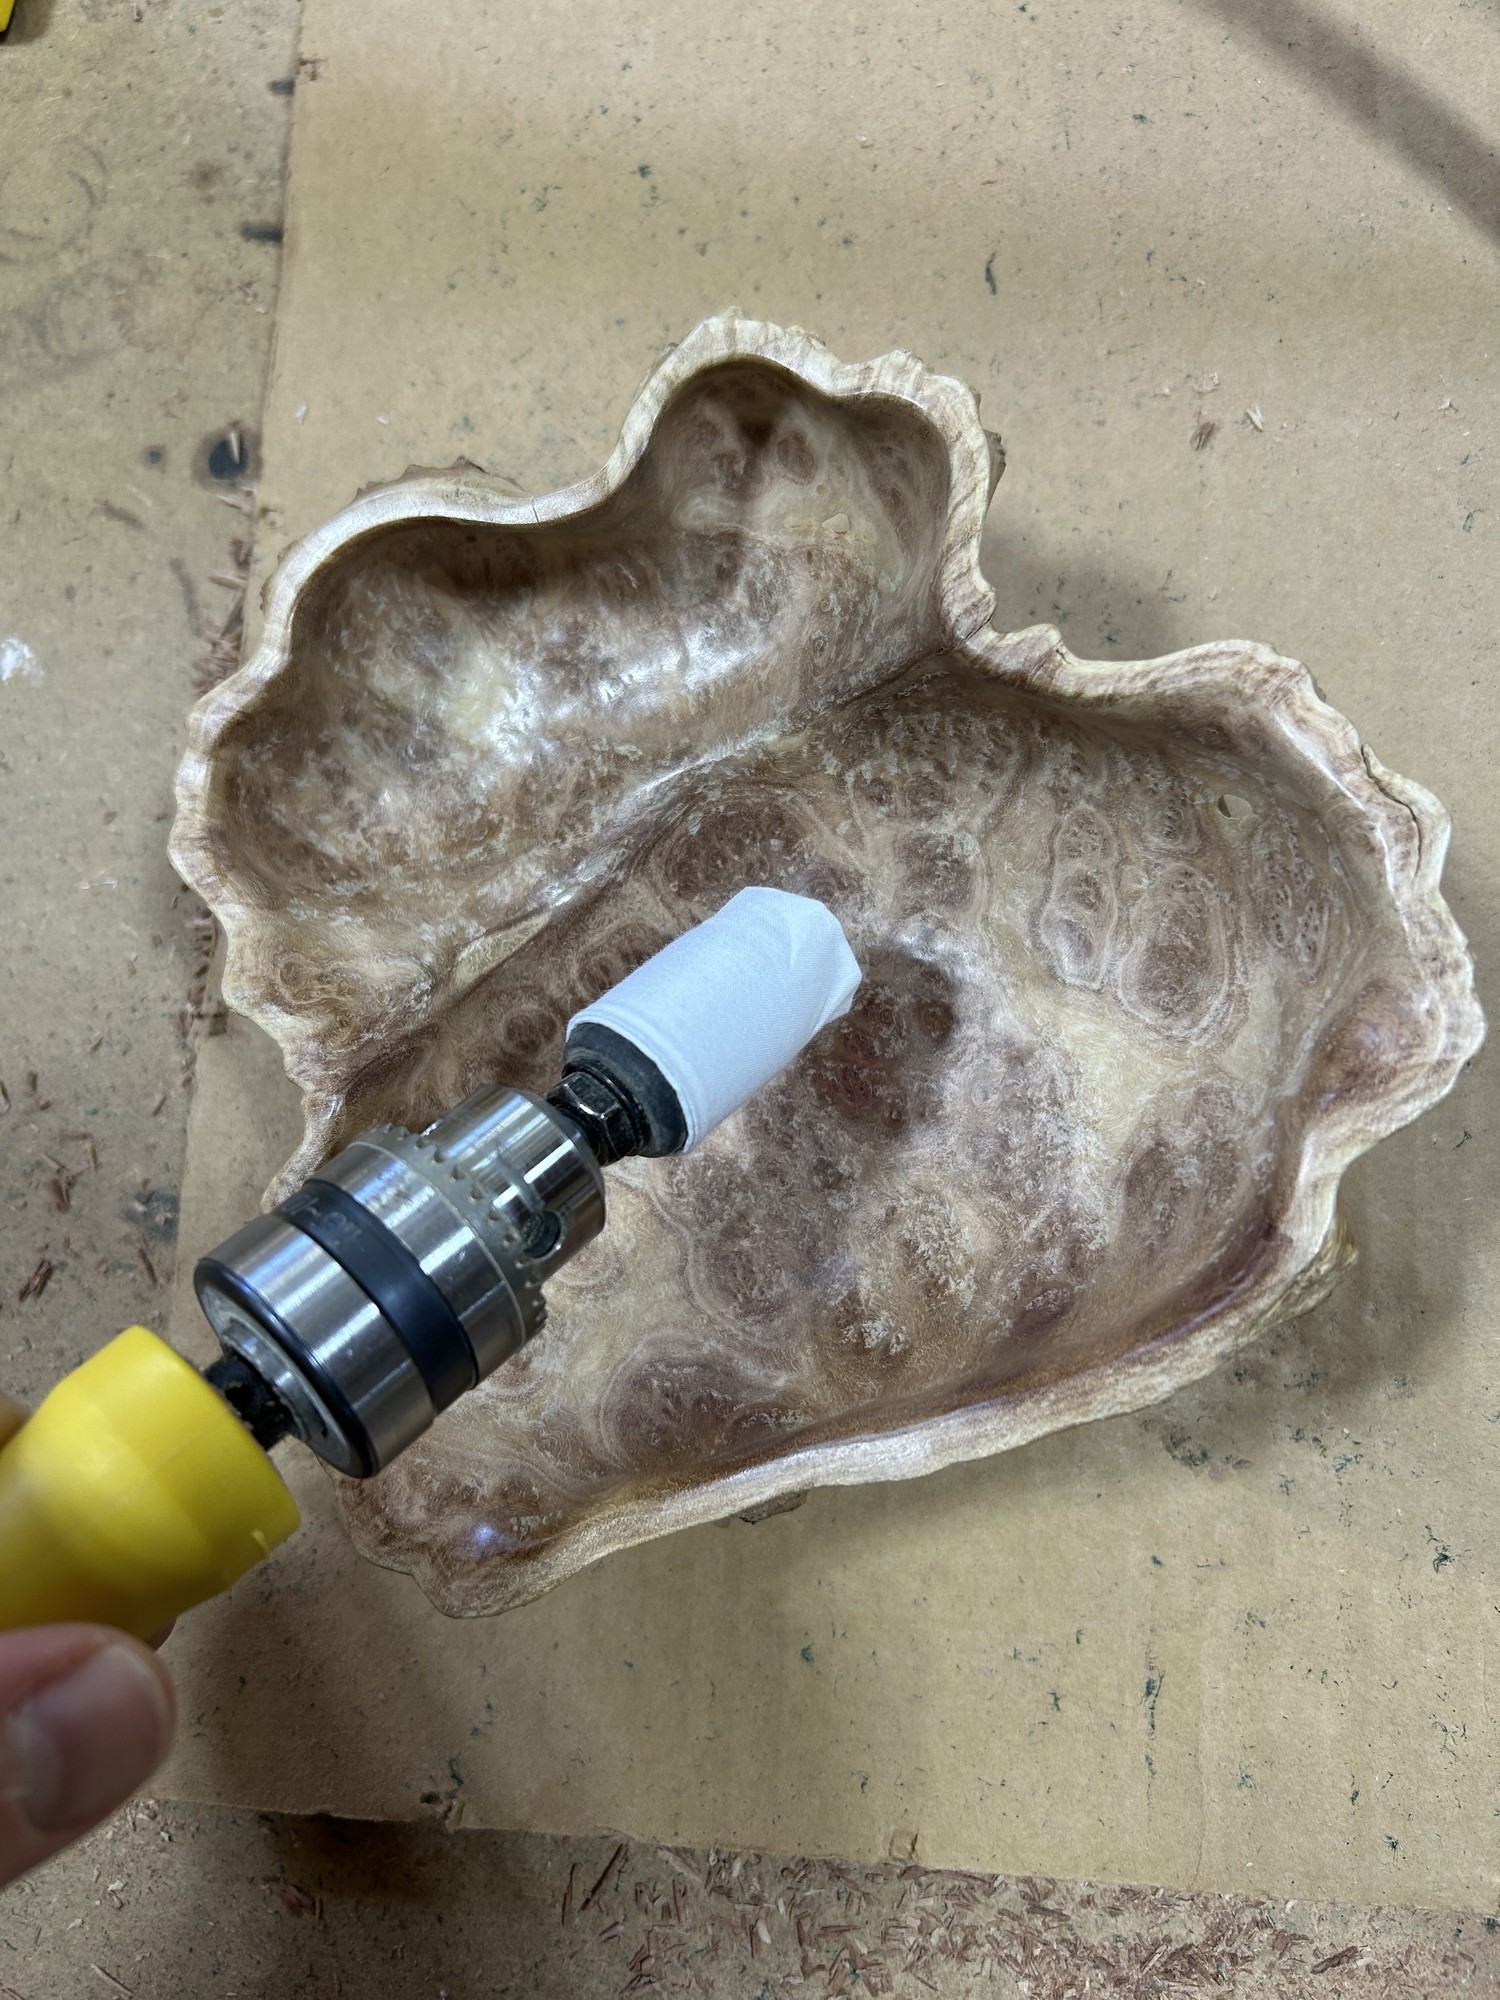
I started with the large, round Guinevere sander6 for large areas and the small, round/drum Guinevere sanders7 8 to get into smaller spaces.
Polishing
I used a combination of the green (180 grit) and red (320 grit) abrasive balls9 (of various sizes) to more finely sand all surfaces and soften any hard lines. Lastly, I used the smal, round/drum Guinevere sander with its polishing cloth 10 to polish the bowl. I found it useful to leave part of the cloth extended beyond the end of the drum. This allowed me to use the end of the drum as well as its sides and to avoid contacting the bare rubber of the drum.
Cleanup
Before applying the finish coats of oil, I cleaned off any debris using a leaf-blower and vacuum (with brush-head to guard against denting the wood) on the burl. I forwent a wet-wipe since I did not want the grain to raise and have to resand/polish.
Finish Coats
The last step was to apply finish to stain and protect the bowl as well as to enhance the chatoyancy of the bowl. I was very happy with the color and grain of the bowl at this stage, so I used Pure (effectively clear) colored Rubio Monocoat11 following the instructions on the back of the can. This minimally darkened the bowl but left the bowl’s color palette otherwise intact. I then left the bowl to dry for two days on a glass bowl to allow airflow and prevent both pooling of the oil as well as wicking of the oil into a porous material such as cardboard (potentially causing a darker region on the bottom of the bowl). I then continued to let it dry/cure for another five days on a paper towel.
Finished Bowl
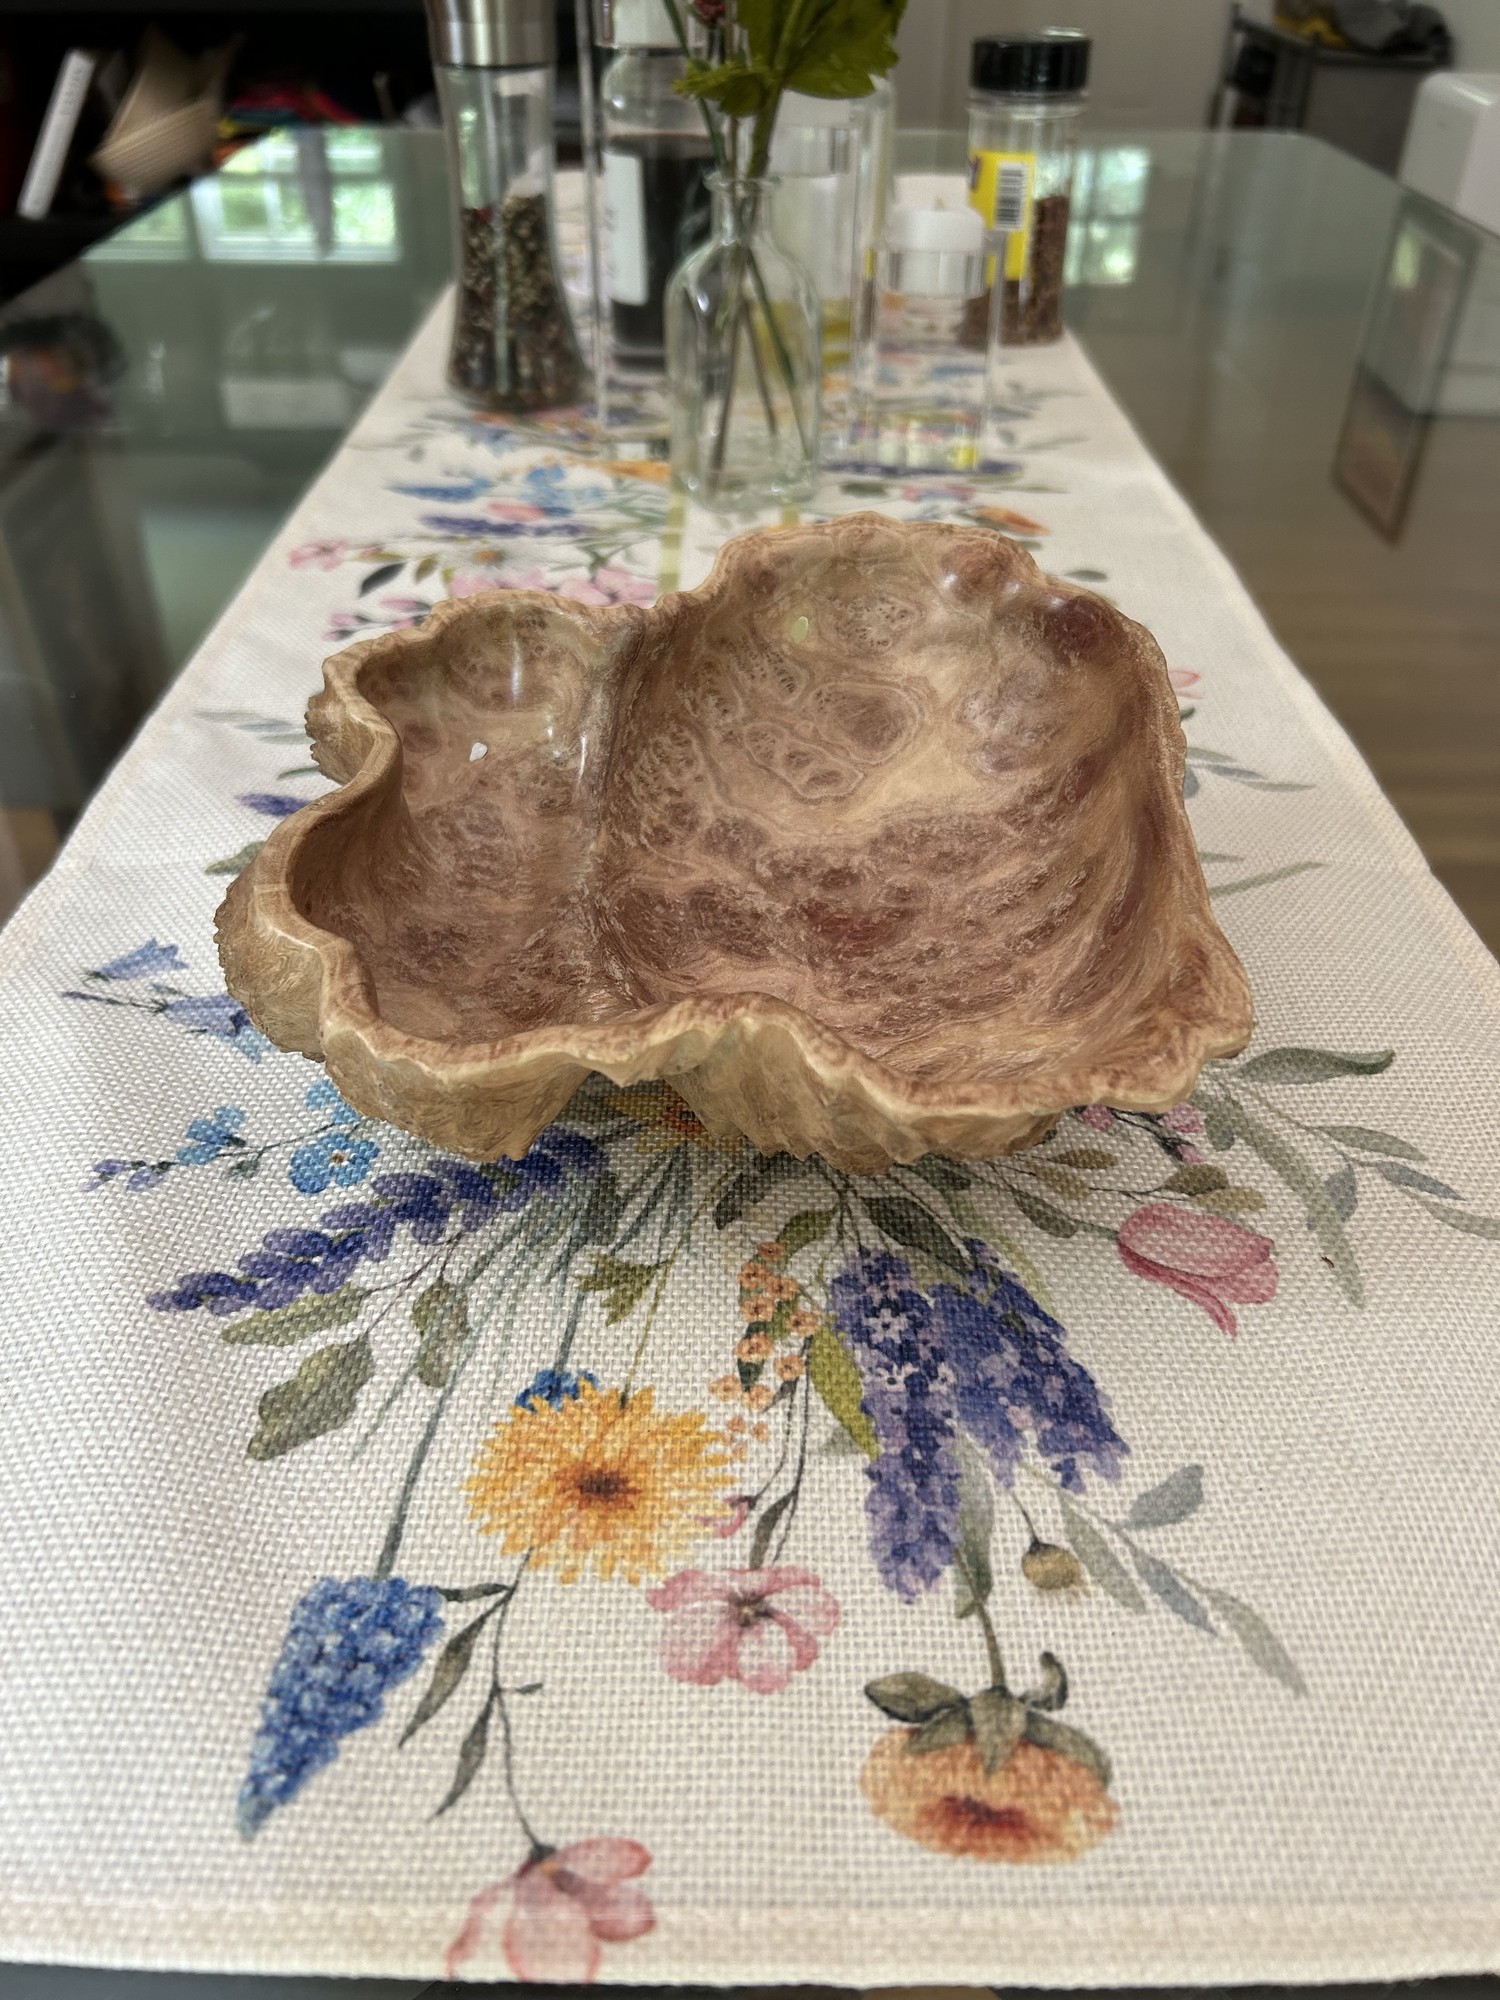
Cheers!
-
https://www.amazon.com/OrbiCut-Speed-Cutting-Tool-Plano/dp/B01N5YGI35 ↩︎
-
https://kutzall.com/products/sphere-burr-1-4-shaft?variant=43438531182822¤cy=USD&utm_medium=product_sync&utm_source=google&utm_content=sag_organic&utm_campaign=sag_organic&srsltid=AfmBOopacfmZnJ43HYD0-Y2Vrs5HfHXpMWG_UJr3LPALxjBM94FYT0d8eRc ↩︎
-
https://kutzall.com/products/rotor-saw-burr-1-8-shaft?variant=43438529478886 ↩︎
-
https://www.amazon.com/Elmers-E7010-Carpenters-Interior-Ounces/dp/B0045PTHH8 ↩︎
-
https://katools.com/11367sr-guinevere-small-round-sander-replacement-bulb/ ↩︎
-
https://www.amazon.com/dp/B0CQ71Y9PT/ref=sspa_dk_detail_0?psc=1&pd_rd_i=B0CQ71Y9PT&pd_rd_w=SGqsj&content-id=amzn1.sym.8c2f9165-8e93-42a1-8313-73d3809141a2&pf_rd_p=8c2f9165-8e93-42a1-8313-73d3809141a2&pf_rd_r=8GS2D0PQP0MHG6YGY8EM&pd_rd_wg=tYeG3&pd_rd_r=167289cb-e035-4a44-b20d-5d041cee73dd&s=industrial&sp_csd=d2lkZ2V0TmFtZT1zcF9kZXRhaWw ↩︎
-
https://katools.com/11368-guinevere-small-drum-sander-cloth-sleeves/ ↩︎